Oh, eBay, how would I know what to covet without you?

There will always be the Next Toy, but this one will probably never grace my camera bag. You might recall me writing about my Totally Awesome® 85mm f/1.2 lens. Man, I love that lens, though it definitely gets the best of me sometimes. That’s what practice is for.

But 85mm is a pretty long lens. It’s for zeroing in on one thing and making the rest of the world fade away. I’m starting to get some good results with it. But it’s not a lens for capturing a street scene, or for holding up over the windshield and grabbing a landscape while driving.

I’ve been mildly curious about the 85’s little brother, the 50mm f/1.2 lens. I looked on eBay last night and found them going for quite a bit more than I was ready to pay. Whew! No new lens lust.

Until I saw…

The Canon 50mm f/1.0 lens. It doesn’t seem like much, that difference of 0.2, and most of the time it isn’t. But the scale is logarithmic, so a difference of .2 down at this end of the scale can be huge in extreme circumstances. (Compare to other lenses that go down to f/2.8 or so and are considered pretty fast. 1.2 is way small, and 1.0 is nuts.) I read reviews from people taking pictures when it’s so dark they can barely even see. Street scenes coming to life at night. Ridiculous control of depth of focus.

Heavy. Not manufactured anymore. Very expensive. The lesser lens will handle almost as much, and even then it’s hard to justify paying less than half as much for the almost-as-good lens.

Still, a guy can dream (of spending thousands of dollars for a piece of glass he doesn’t need).

A guy can dream.

3

Venus!

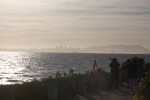
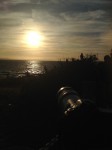
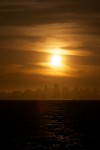
I knew that there would be lots of people taking pictures of the sun as little Venus crawled across its face, and I knew that I could never hope to match the pros. I decided instead to emphasize the surroundings of the shoot instead. I happen to live near a city with a distinctive skyline, so I thought I might try for a dramatic sunset that just happened to have the little black spot of Venus on the sun.

But where could I stand so that the sun would set right behind the Transamerica tower? I fretted over maps and even drove up the coast on an unsuccessful scouting mission, but in the end I discovered that the ruler tool in Google Earth made the job ridiculously simple. I knew the sun would set at 300° azimuth, so I just had to click on downtown San Francisco and draw a line at 120° over to the other side of the bay. The ideal spot was right at the end of the runway at Oakland International Airport. I didn’t quite get to the ideal spot, but darn close.

As you can see in the pics, I was not the only one who did the math. All that was left was for the gods of photography and those of meteorology to shake hands.

I had a problem with stupidity for a while; fortunately I got over it before the critical period. Also, nothing makes dirt on your sensor show up like shooting at really high f-stops. Should have cleaned diligently before a last-chance-in-this-lifetime photo op. There were light clouds on the horizon, so my dream shot was not to be, but as the sun passed through a gap just above rooftop-level I shot like crazy. In retrospect, I should have shot even more, and exposed some of them far less, to give Venus a chance. As it is, however, I got about sixty nice sunset shots to choose from for this gallery. Not bad for an evening’s work.

3

A New Toy

When I got home from work today, I was beat. Plum tuckered out. I came in, hugged my sweetie, and plopped in front of the computer. Then she told me about the package in the living room. Suddenly I had a new burst of energy, and I spent the evening photographing stuff around the apartment. Anything that would hold still, really.

You see, there’s a camera lens I’ve been looking at for a long time. Sometimes I’ll even look in on eBay to see if one is going for less than usual. Last week, I found one at a good starting price. No one had bid. It was a few hours before the auction ended, but for stuff like that all the action happens in the closing seconds. Still, I set an alarm for a couple of minutes before the auction ended. If I wasn’t busy doing something else, I’d look back in and watch the action.

No one had bid. Time was winding down and no one at all had bid on the lens. It was more than I could afford, more than I had any business spending. The seconds ticked down in red digits. An appeal to my sweetie followed, hoping for reason but dreading reason far more. My finger was on the button, ready to pounce.

I bid. I won. I have a new lens. It’s awesome.

A little camera geekery: photography is filled with numbers, and this lens has one eye-popper: f/1.2. The smaller the number, the ‘faster’ the lens – the more light it gathers in a given period of time. 1.2 is a very small number, meaning this lens can open way up and take in a lot of light. That in turn means it works very well in low-light situations. That can be really handy when it’s not practical to lug lights to where the action is. There’s another side effect of this gaping aperture, and that is that the depth of focus can be very, very shallow.

Depth of Focus is a little tough to explain because we don’t experience it with our eyes – they are constantly refocusing on whatever we’re interested in at the moment. But the concept is really simple. When things are too close to the lens, they go out of focus. Too far, out of focus. Then there’s a middle range where the picture is sharp. With some lenses that middle range is so huge that pretty much everything is in focus, unless it’s really close. That’s a good quality on an instamatic with fixed focus. The lens trades off in other ways to get that effect, but for taking pictures at the beach it works pretty well.

My new lens is at the other end of the spectrum. Consider these two pictures I took while sitting a few feet back from my desk (you can click to see them larger):

my mug, focused on the front of the rim

my mug, focused on the front of the rim

my mug, focused on the back of the rim

Even from a few feet away, the depth of focus is maybe three inches. Those candles are about four inches behind the mug.

Why would anyone want a lens with such a restriction? Holy carp, it can be pretty tricky to get the focus just right when there’s so little room for error. You could seriously get one of your subject’s eyes in perfect focus, but not the other.

But look how the mug is not lost in the clutter of my desk. Those are pictures of my mug, and nothing else gets in the way. I have pictures of rock stacks on rocky backgrounds, and headstones in a cluttered graveyard that could really have benefitted from this technique. When things are similar color or texture as the background, focus can make all the difference.

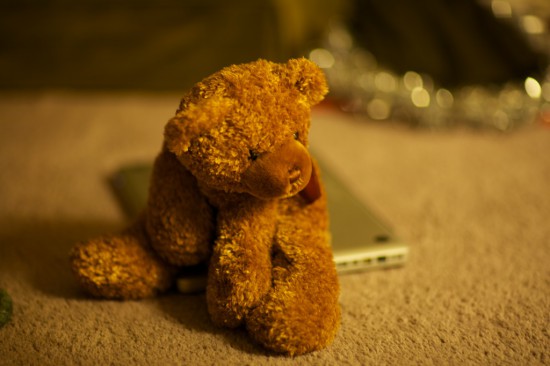
My sweetie was laughing at me as I drifted around our apartment, which is currently in a state upheaval for our move, taking pictures of this and that. I wanted something sparkly. I found it in the living room, where this teddy bear also lurked.

My first portrait subject with my new 85mm lens.


It’s not just that things are out of focus, it’s that they’re beautifully out of focus. Note how deliciously soft the candles are behind my mug. In this shot, I had to choose what point on the bear’s face I wanted to focus on – note that the closer ear is in the soft-focus zone.

Why did I want sparklies? It’s a good way to show the bokeh, or the characteristic of the way the lens blurs the image. My new lens is carefully built to provide smooth, circular bokeh. This is a function of the way the aperture control works – the dots are actually projections of the iris mechanism inside the lens. Often they are hexagonal or another geometric, unnatural shape. It’s most obvious for the sparkles, but it affects the rest of the shot more subtly as well.

I’m sure that somewhere in my great heap o’ pictures I have some that demonstrate other bokeh, but I’m not sure where. I could go digging, but tonight is about the new lens.

The new, awesome lens.

2

Cutie of the Day!

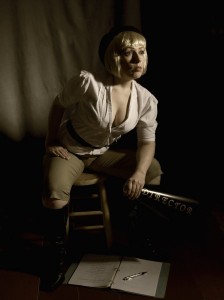
Last weekend Harlean Carpenter (who is a fiction) and I did a Christmas-themed photo shoot. While I concentrated on even lighting that didn’t flatten the subject and limiting the depth of field, Harlean concentrated on looking good.

After little bit of post production Harlean sent off one of the pics to Bachelor Pad Magazine, where online Harlean is the Christmas Cutie of the Day! (The Chirstmas Cutie pictures are safe for work unless your work is uptight. MSFW, I think the kids call it.)

We definitely got an old-school feel for the picture that I quite like. Go check it out! Quick, before the day is over!

3

Vote Early, Vote Daily

One of the more popular print pinup magazines is having a photo contest, and the prize is a four-page spread in their magazine. We’re in the hunt but a bit back from the front-runners, so a last-minute burst of voting would be awesome!

The contest is through Facebook and there are some pictures that are pretty obviously doing well because of better networking rather than actual quality of the photos. So it’s time for Harlean and me to beat the bushes and get ourselves past the obvious duds and up to the front!

Here’s the link:

Vote now! (Note: the picture is definitely pin-uppy, but all the pics in the contest meet Facebook’s guidelines.)

Note that you can vote once per day, so don’t think you’re done stuffing the ballot box after one visit. It costs you nothing and takes just a few seconds.

And, as always, thanks.

2

Brains!

Harlean (who is a fiction) has an ambitious shooting schedule set up. There are several magazines asking for submissions for Halloween spreads and contests, and she figures it’s time to get her fictitious face in them.

I am moderately less fictitious, and my role in all this is to take pictures.

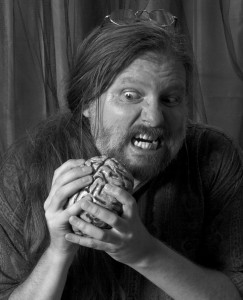
Today’s shoot was zombie-themed, and we had a prop brain, of course. Once the serious shooting was done, I experimented a bit on myself, going for over-the-top dramatic lighting and (surprise) a bit of silliness.

Braaaaains!


What they call low-key lighting, even though the key light is totally dominant.

Braaaaaaaiiiiiiinnnnns!


Hey, there’s a light up above the set, may as well crank it up and take off the diffuser. (“Diffuser” is a fancy word for “piece of paper”.)

Braaaaaaaiiiiiiiiiiinnnssssssssss!!!!!!!!!!


The logical conclusion of the sequence, shot with only a light above and behind. I was going for that back-alley distant-streetlight shadow-dwelling hyphen-using brain eater look here.

Brains.


This was actually the first shot I took. The light doesn’t hit my face right, but I like my expression. So let’s justify putting it here by making it black and white and cropping it down to a head shot.

5

Things I Learned Today

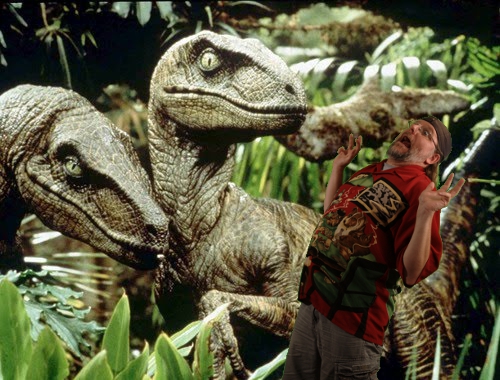
Green screen! Once you have lights and a background stand, the next step is inevitable.

  • No wrinkles in the green screen!
  • Light the green screen evenly, but don’t obsess over it.
  • Hair must be glued down
  • If Photoshop annoys you, you should try GIMP. Photoshop will seem a lot better after that.
  • As you can tell from the following image, you really should know what background you’re going to put your talent into before you shoot. Otherwise you get Utahraptors with hard light hitting from above, and a victim lit softly from the side.

Jerry with Utahraptors

Are they about to kill me, or are they just admiring my shirt?

2

Pinup Lifestyle Contest Entry

The theme for this month’s contest is “Red, White, and Blue.” Harlean (who is a fiction) and I didn’t have a chance to do a shoot specifically for the contest, but she went back into the archives and found a shot from the days of yore and gussied it up for this contest.

If you’d like to vote for us, we’d really appreciate it! The deadline is tonight, but just what time that means is anybody’s guess. Don’t wait another minute!

While you’re there, you have four other votes to spend, and there are some worthy entries. If you insist on voting only for ones that are on theme (olive drab is now part of red, white and blue it seems), that limits your options quite a bit, however, and if disrespecting the flag while trying to appear patriotic bothers you, then options are limited yet more. Even so, there are a few nice pics, so quit wasting you time here and go waste your time over there.

2

Taking Pictures of the Wall

I’ve said before that nobody was more surprised than I when I outgrew my camera. Well, that’s nothing that a regular paycheck can’t solve, and now I not only have a better camera (only four years out of date!), I have other gear as well. The most significant addition to the toybox has been fancy strobes and an assortment of accessories. No more shooting with 60-watt desk lamps with long, long exposures (unless I want to).

Now I have plenty of light, but last shoot I was frustrated, needing to move an umbrella back for better coverage, while at the same time needing to move it forward to make the edges of the shadows softer. Harlean’s fictitious feet were often in shadow. There’s a toy called a softbox that most photographers use in situations like this, but I don’t have any of those (yet), and in my little living room/studio there really isn’t room for them. So, I need to get the most out of my umbrellas.
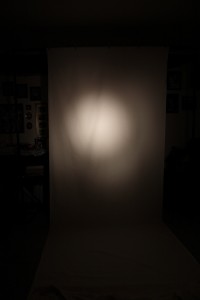
One of the more interesting pictures of the backdrop. Seriously.

The first step is figuring out just what they do. To this end my faithful sidekick set up a large blank surface and I spent the afternoon taking pictures of the way the light splashed on the wall as I moved the light in and out, and what effect shifting the light in the focus of the umbrella had. I also experimented with grids that limit the dispersion of the light and with some of my other new toys.

Important to the exercise was the ability to see the result of each shot. My camera has a pretty large LCD, but for judging lighting I just don’t trust it. I needed instant feedback on a larger screen. Happily, Canon has software to allow the camera and my computer to talk to each other in real time. Take the picture, it’s loaded onto the computer and appears on the screen. The problem: Canon is run by idiots and you can’t download and install the software. They have updaters, but you have to start with an install from the CD that came with your camera. I had a CD. It’s around somewhere. Maybe in San Diego. A while back I got them to send me a second CD which I think is in New Mexico. Yep, they’d rather mail me a CD than let me download the stupid software.

Canon’s logic, near as I can figure: “We can’t let just anybody download this software! Non-Canon users might get hold of it and… like it and… wish they could take advantage of the features that only work with a Canon camera and… buy our cameras. We can’t have that! (Wait, what?)”

Anyway, it turns out the “updater” is a full installer that’s been jiggered, and once I learned how to un-jigger an older installer and then update with the newer updater, I was good to go. On with the experiment!

I have to say that the results were not always what I would have expected based on my Physics classes. I learned quite a bit: 1) I should not have had any trouble lighting Harlean’s feet. 2) moving the light in and out of the umbrella’s focus affected brightness more than the spread of the light, and 3) there’s only so long you can take pictures of a blank surface.
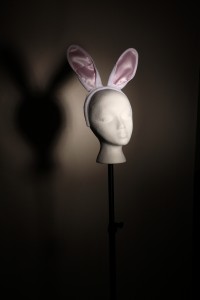
"Bunny Head" shot with similar light to the blank shot above.


If you will recall, the other lemma (half of a dilemma) stated above was that I wanted to keep shadows soft. Larger light sources make softer shadows, so you can soften shadows by moving the light closer to the subject (so it appears larger). My experiments shooting against a blank surface couldn’t give me any insight on that front, so once I was more comfortable with the way the light spread, it was time to put something in front of the lights that had features that cast shadows. Enter the foam head with bunny ears.

(I’ve been trying to come up with a technical justification for the bunny ears, but in the end I just thought they’d be fun. And! Ooo! The pink lining gave me a way to judge color saturation. So there you go. The bunny ears were critical.)

Talk about a tough subject to photograph. Bright, shiny, pure-white objects are unforgiving to say the least. Get enough light to bring out texture, and you’re getting harsh reflections as well. I spent an hour or so moving the light (singular) around in a scientific fashion, comparing the results after careful variations. Then I got tired of that and just tried to take a few good pictures.
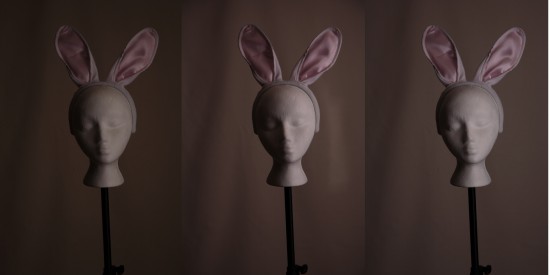
Some random samples from the head-shooting experiments. I seem to have grabbed dark ones. There are some interesting differences if you know how the light was changed each time.


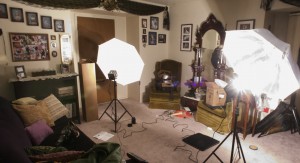
After that exercise, I had to get a picture of the whole setup. Out came the old camera, set up on a cardboard box. I set the shutter to one second so I could hear it click and take a picture with the main camera (causing the flash to pop). I spent maybe half an hour on this one stupid shot, trying to get cool shadows on the floor, a nice look at the laptop screen, and a good feeling for the surrounding room. The light of my life pointed out a fun visual element in one picture that then became a requirement for the final. I’d take a few shots, go back to the big computer, experiment with cropping, decide I could do better and go back out to the studio again.
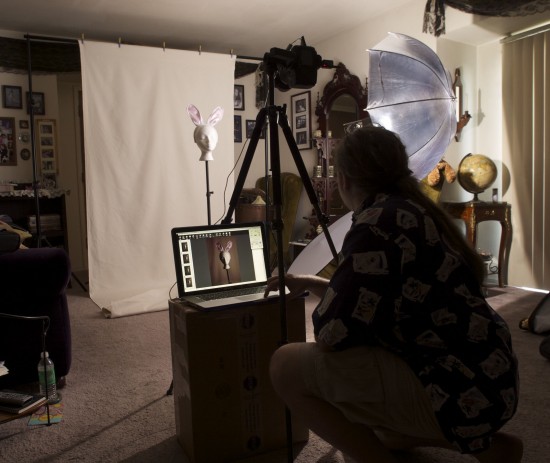
Experimenting with lighting, using a foam head and bunny ears.


A little technical geekery: those looking closely might notice that the background appears a lot darker in the photo on the laptop screen. The light is much closer to the head than to the backdrop, so the head gets more intense light. When the exposure is correct for the bright white head, the background is underexposed.

I never got the perfect shot. Perfection is a thankless bitch, remote and unattainable. We all chase her, and some get closer than others. The question is: will you learn from her rejection? Am I a better photographer for spending a day taking a couple hundred pictures (and looking carefully at each) that no one will ever see? I hope so. We’ll find out soon enough.

And that, my friends, is how you spend a Sunday!

1

Can Someone do me a Favor?

It’s not a big deal; I just need someone to remind me that I do NOT need the Canon 85mm f1.2 L II lens. Really, I don’t. It doesn’t matter that this lens allows one to shoot with incredible control over the depth of field, nor is it important that the almost-circular aperture produces lovely “bokeh” (the highlights in the out-of-focus region are often hexagonal or octagonal in most lenses, projecting the shape of the aperture inside the lens). On top of that, I have lights now, so the excellent performance in low light is not nearly as important as it once was.

And 85mm is too long for most of the shots in our little “studio” (which resembles a living room much of the time). Sure, when I get in close for some of my favorite shots there may be no better lens on the planet, but that’s — what? — maybe 20% of my total on a typical shoot with Harlean (who is a fiction). Maybe even less.

Sure, if I were to start taking pictures of other, less fictitious models, in roomier conditions, and if I had the skill and could control my light well, then this lens would be the crown jewel of my little collection.

But I don’t. And I’m not. So, could someone out there remind me that I really don’t need that dang lens?

3

Lucky Picture

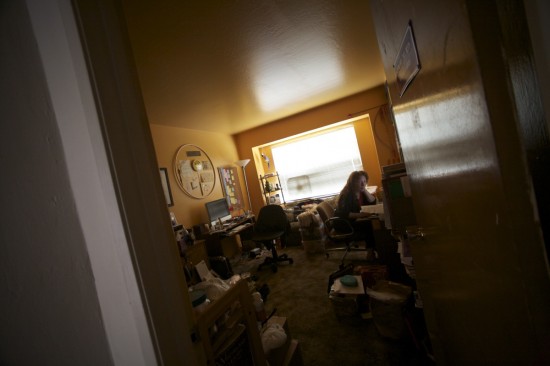
While we’re on the subject of photography, I’d like to share this bit o’ serendipity. I got this picture while testing some of my new flash gear:

My Sweetie running her eBay empire

It’s a little dark but if you click on it to see it larger it works.

“But Jerry,” you say, as your ever-vigilant eyes scan the above photo, “there’s no sign of any flash in that picture at all.” And right you are, Sparky! The strobe was set up out in the living room. “But if the flash is in a different room, how is the picture possibly a test of that flash?” you ask, unflagging in your quest for a more perfect understanding of the world around you. Good on you!

To make a short story long, recently I was doing a shoot with my sweetie and the strobes stopped popping, right in the middle of the shoot. The cable from the camera to the master strobe was bad, and if it weren’t for the fact I had another the shoot would have been a major pain (back to lighting with desk lamps). These cables fail pretty often, I understand, because as you move the camera around the connectors are constantly being loosened. Even the guys who preach not spending a single unnecessary penny on gear recommend getting good radio transmitters to fire the flash units.

So, this picture was taken the day the new transmitter and receiver arrived. I had a flash set up in the living room and I was seeing how far away I could get and still have the flash go off. (The answer to that: not very far. The radio worked fine, but it’s a very small apartment.) So I shot the above from my hip (quite literally), with no intention of keeping it.

But, when I looked at it, I liked it. If you look really closely you can see there’s some camera shake, but overall it looks pretty good, if you ask me. So, enjoy!

Hair Haloes

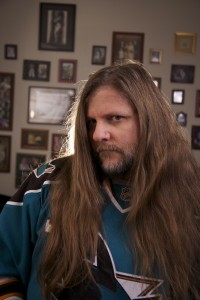
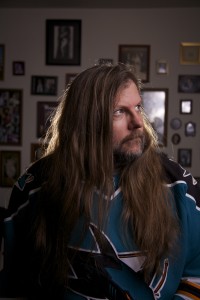
Today’s exercise: separate the subject from a busy background by backlighting the hair. Fortunately I had a model handy with plenty of hair to backlight, and that model was willing to keep experimenting as long as I was. Me. Unfortunately, the challenge of getting a good shot when using a new technique takes a lot longer when you can’t look through the camera as you’re setting up the shot.

I’m sure there’s a more technical term for an accent light shot directly through the subject’s hair, but I don’t know it. I thought it was “hair light”, but it turns out that’s something else.

Self-Portrait, April 23, 2011

Self-Portrait, April 23, 2011, experiment with hair haloes.

Still, it was a pretty successful day. I took more than 100 shots and after a while I was confident enough in the setup that I could concentrate on taking self-portraits that were actually interesting to look at. Nineteen shots remain in my “keeper” bin, though I have no idea what I’ll do with them. Looking at the keepers, I can see that I have a weakness for the overly dramatic. I suppose it’s nice to even have a recognizable style at all. All these images are straight off the camera with no tweaking or even cropping. I swear they weren’t all this over-the-top. Really.

A slightly less overdramatic (and therefore less-liked by me) self-portrait.

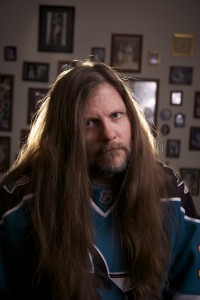
These photos don’t necessarily represent the best (my opinion of which changes every moment anyway), but the most representative of the technique. There’s no rocket science here; I got the main lights as close to me as possible so I could turn them down pretty low. That meant less light hitting the busy wall behind me. Directly behind my head is a third light that backlights my hair. I probably should have played with different intensities of that light more.

Even though there's a lot of shadow on me, the hair halo really separates me from the background.

This is the last shot of the day, and the fill light didn’t fire at all. (It’s set to flash when it sees another light flash, but all the lights were turned down pretty far and the fill light was behind an umbrella.) That left my head very dark, but the back light really pops me out from the background. All these photos have reflections of the lights in the glass behind me. In the one above you get a particularly clear look at the spokes of the fill light’s umbrella. Reflections are a bitch, man.

One of my favorite self-portraits ever! I really like the composition, how much my face shows, and how the colors in the jersey came out on this one. By keeping things just a touch underexposed the colors get nice and saturated.

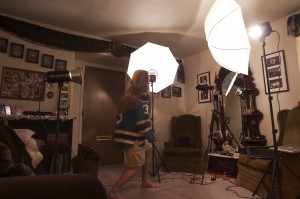
I don’t know how often I’ll actually need this technique, but it turned out to be pretty easy. Here’s the setup:

The setup for Self-Portrait Saturday

For the fill light I could have opened the curtains just off-camera to the right rather than setting up a strobe, but then I would have had to worry about shutter speed, and that was one more variable than I wanted to deal with when I couldn’t look at the result after every shot.

The setup picture itself was taken with our older camera. I propped on a footstool and set it for two-second exposure. When I heard it click, I took a picture with the main camera, which of course caused the strobes to pop and light the scene for both cameras.

2

Quick! Vote for Harlean and Me!

Pinup Lifestyle is a Web community devoted to, well, the pinup lifestyle. Every month they have a contest in which pros and amateurs alike compete for fabulous prizes. Harlean Carpenter (who is a fiction) and I make a habit of entering, and while we haven’t won we certainly separate ourselves from the amateur crowd. As I master the new lights, perhaps we’ll even threaten the pro bunch. We’ll see.

Director's Cut

Director's Cut - Harlean Carpenter photographed by Jerry Seeger

One thing that distinguishes the pictures Harlean (who is a fiction) and I make is that they are not simple glam shots. (Fixed typo: clam). We always try to tell a story with the setting and the makeup and the pose and all of that. I’ve discovered recently that it’s quite possible to have a technically excellent photo that does not say a thousand words. We try not to fall into that trap. Perhaps it’s not for me to judge whether we succeed, but I think out photos stand out that way.

So head on over and vote for us! (The Wildfire site is currently not Safari-friendly, unfortunately.) There are a ton of entries this time, so hang out and find worthy recipients for you other four votes as well. There’s some pretty good work over there. Almost as good as ours!

5

Pictures of Something Besides Shoes

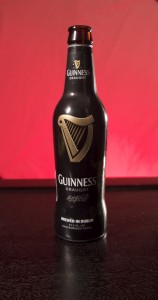
Since I’ve been playing with my new strobes, I’ve taken a lot of pictures of shoes. Well, let it not be said that Jerry Seeger is a one-dimensional, shoe-only kind of photographer. I’ve now also photographed an actual human being (albeit a fictitious one), and, most recently, I’ve expanded my inanimate object repertoire to include beer bottles.

Lacking the energy to write an episode for you all, I’ve decided to share a couple of experiments I did splashing colored light off a white backdrop, and using the shutter speed to control how much color got mixed in. One of the biggest challenges was keeping the light from the strobes from hitting the backdrop.

guinness on green

Beer Bottle on Green Background.

Beer bottle on green background. On this shot you could really see the wrinkles in the white backdrop, so I smoothed them out in iPhoto. Some odd things happened in the process, strange smudges that appear and disappear again, making me wonder once more what the %^*$ iPhoto is really doing. But I keep using iPhoto for quick-and-dirty stuff (which is just about everything). Why? Because it’s easy and has better workflow than any other program. Better for me, anyway.

Beer Bottle on Red

Beer Bottle on Red Background

Beer bottle on red background. This one I shot with my fish-eye lens, which let me get right up in the bottle’s face, putting the backdrop out of focus. In both cases I was keeping the aperture about as far open as it would go. No need for touching up. Getting a rich red color and still lighting the bottle well proved to be tough – extra light on the bottle washed out the background. In the end I had stray equipment covers, a laptop case, and a sofa pillow all blocking bits of offensive light. The pillow was blocking lens flare from the strobe behind the bottle on the right, the laptop cover blocked the right strobe from spilling onto the background, while another black nylon case blocked (most of) the spill from the front-left light onto the backdrop. I need a snoot!

4

New Toys!

Recently I did a shoot with Harlean (who is a fiction), and ended up cranking the ISO setting on my camera up to 1600 just to get shutter speeds in a reasonable range. That left her with some pretty tough cleanup in post production, and meant the pictures were not what they could have been. “That does it!” said I, “We’re gettin’ us some lights!”

After some research I chose Alien Bees for my new strobes. In (sometimes heated) discussions online the only concrete criticism light snobs could downgrade the Bees for was not costing enough. The day I’m good enough to say, “you know, I could really use better strobes,” will be a good day indeed. (Although, I once thought I would never need more camera than the one I have now, and guess what? I think I’ve actually reached the stage where I would get better pictures with a better camera. No one is more surprised by that than I am.)

Lights!

My new Alien Bees, ready for work.

Anyway, the lights arrived today and I made a shambles of the living room unpacking boxes and setting things up. Pretty slick, huh? I’ll still be looking at accessories — first step, CTO gels to mix better with the ambient light, then maybe a softbox or two. We’ll see. There’s more than enough to keep me busy as it is.

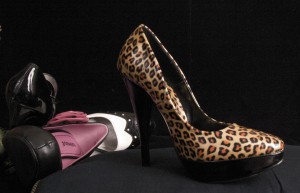
Naturally, I wanted to get to work taking pictures right away, but it would not be fair to ask a human to sit through hundreds of experimental shots while I fiddle around with lights in the “lets see what this will do” mode. I asked my sweetie if I could borrow some shoes to shoot. She has a few pair kicking around. I figured shoes were interesting, and had an architectural quality. I wanted to see if I could capture the curves and forms with well-placed light.

shoes!

Still life with high heels.

I wasn’t very specific about what sort of shoes, but she came through with four shoes that each presented different lighting challenges. One high-contrast, another very shiny, and so forth.

I took a lot of pictures of shoes, at different angles and with different backgrounds. In some cases, the background was lit better than the shoe, in others, some details of the shoe were lost. In many you can see my reflection in the leather, not just the reflection of the lights (which is problem enough).

Note that I didn’t spend a lot of time choosing the photos to go in this episode — they’re decent examples but not necessarily the “best” — whatever that means. Each of these has something I like, however.

It became apparent pretty quickly that having lots of light is useless if you can’t control it. I knew this intellectually already, but there’s nothing like getting down there in the trenches to bring the lesson home.

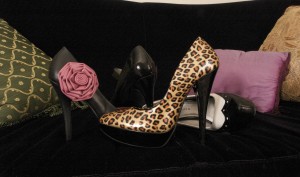
more shoes!

Another still life with shoes.

I also got some fun serendipity along the way, like light reflecting off the lining of one shoe creating a great highlight in the heel of another.

I got a bit worried after a while, that I couldn’t turn the lights down enough to let me open the aperture to limit my depth of field. Now, there was a problem I didn’t anticipate. It turns out, as I was reviewing the photos to post here, I realized that my camera was still set to ISO 1600 from the other day. Tomorrow when set the speed down to a safe and sane 100, I’ll get much richer pictures and a lot more options for exposure. So, while these pictures have their flaws, I’m really excited about how my pictures will look after a few thousand more practice shots. Woo hoo!

5