I’ve said before that nobody was more surprised than I when I outgrew my camera. Well, that’s nothing that a regular paycheck can’t solve, and now I not only have a better camera (only four years out of date!), I have other gear as well. The most significant addition to the toybox has been fancy strobes and an assortment of accessories. No more shooting with 60-watt desk lamps with long, long exposures (unless I want to).
Now I have plenty of light, but last shoot I was frustrated, needing to move an umbrella back for better coverage, while at the same time needing to move it forward to make the edges of the shadows softer. Harlean’s fictitious feet were often in shadow. There’s a toy called a softbox that most photographers use in situations like this, but I don’t have any of those (yet), and in my little living room/studio there really isn’t room for them. So, I need to get the most out of my umbrellas.
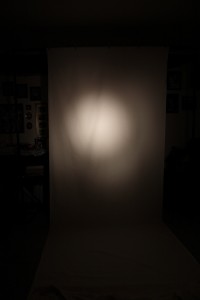
The first step is figuring out just what they do. To this end my faithful sidekick set up a large blank surface and I spent the afternoon taking pictures of the way the light splashed on the wall as I moved the light in and out, and what effect shifting the light in the focus of the umbrella had. I also experimented with grids that limit the dispersion of the light and with some of my other new toys.
Important to the exercise was the ability to see the result of each shot. My camera has a pretty large LCD, but for judging lighting I just don’t trust it. I needed instant feedback on a larger screen. Happily, Canon has software to allow the camera and my computer to talk to each other in real time. Take the picture, it’s loaded onto the computer and appears on the screen. The problem: Canon is run by idiots and you can’t download and install the software. They have updaters, but you have to start with an install from the CD that came with your camera. I had a CD. It’s around somewhere. Maybe in San Diego. A while back I got them to send me a second CD which I think is in New Mexico. Yep, they’d rather mail me a CD than let me download the stupid software.
Canon’s logic, near as I can figure: “We can’t let just anybody download this software! Non-Canon users might get hold of it and… like it and… wish they could take advantage of the features that only work with a Canon camera and… buy our cameras. We can’t have that! (Wait, what?)”
Anyway, it turns out the “updater” is a full installer that’s been jiggered, and once I learned how to un-jigger an older installer and then update with the newer updater, I was good to go. On with the experiment!
I have to say that the results were not always what I would have expected based on my Physics classes. I learned quite a bit: 1) I should not have had any trouble lighting Harlean’s feet. 2) moving the light in and out of the umbrella’s focus affected brightness more than the spread of the light, and 3) there’s only so long you can take pictures of a blank surface.
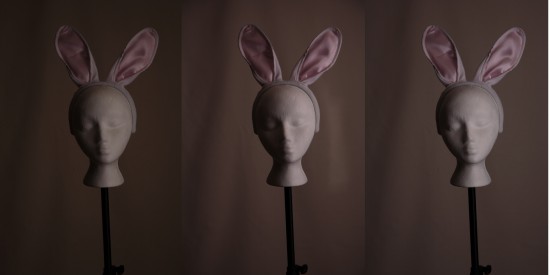
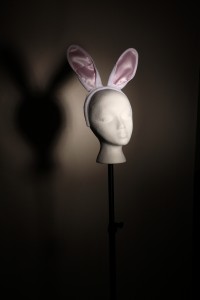
If you will recall, the other lemma (half of a dilemma) stated above was that I wanted to keep shadows soft. Larger light sources make softer shadows, so you can soften shadows by moving the light closer to the subject (so it appears larger). My experiments shooting against a blank surface couldn’t give me any insight on that front, so once I was more comfortable with the way the light spread, it was time to put something in front of the lights that had features that cast shadows. Enter the foam head with bunny ears.
(I’ve been trying to come up with a technical justification for the bunny ears, but in the end I just thought they’d be fun. And! Ooo! The pink lining gave me a way to judge color saturation. So there you go. The bunny ears were critical.)
Talk about a tough subject to photograph. Bright, shiny, pure-white objects are unforgiving to say the least. Get enough light to bring out texture, and you’re getting harsh reflections as well. I spent an hour or so moving the light (singular) around in a scientific fashion, comparing the results after careful variations. Then I got tired of that and just tried to take a few good pictures.

Some random samples from the head-shooting experiments. I seem to have grabbed dark ones. There are some interesting differences if you know how the light was changed each time.
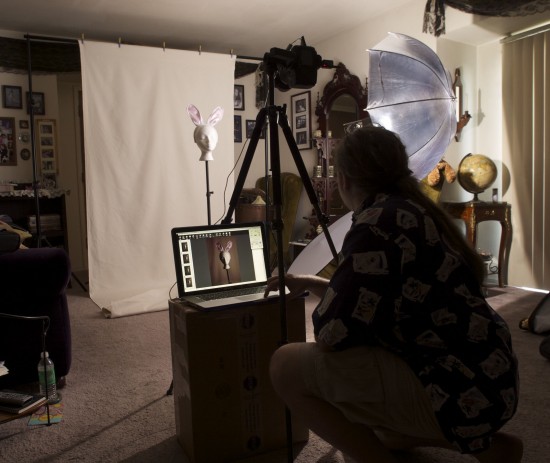
After that exercise, I had to get a picture of the whole setup. Out came the old camera, set up on a cardboard box. I set the shutter to one second so I could hear it click and take a picture with the main camera (causing the flash to pop). I spent maybe half an hour on this one stupid shot, trying to get cool shadows on the floor, a nice look at the laptop screen, and a good feeling for the surrounding room. The light of my life pointed out a fun visual element in one picture that then became a requirement for the final. I’d take a few shots, go back to the big computer, experiment with cropping, decide I could do better and go back out to the studio again.
A little technical geekery: those looking closely might notice that the background appears a lot darker in the photo on the laptop screen. The light is much closer to the head than to the backdrop, so the head gets more intense light. When the exposure is correct for the bright white head, the background is underexposed.
I never got the perfect shot. Perfection is a thankless bitch, remote and unattainable. We all chase her, and some get closer than others. The question is: will you learn from her rejection? Am I a better photographer for spending a day taking a couple hundred pictures (and looking carefully at each) that no one will ever see? I hope so. We’ll find out soon enough.
And that, my friends, is how you spend a Sunday!


