A New Tool (almost)

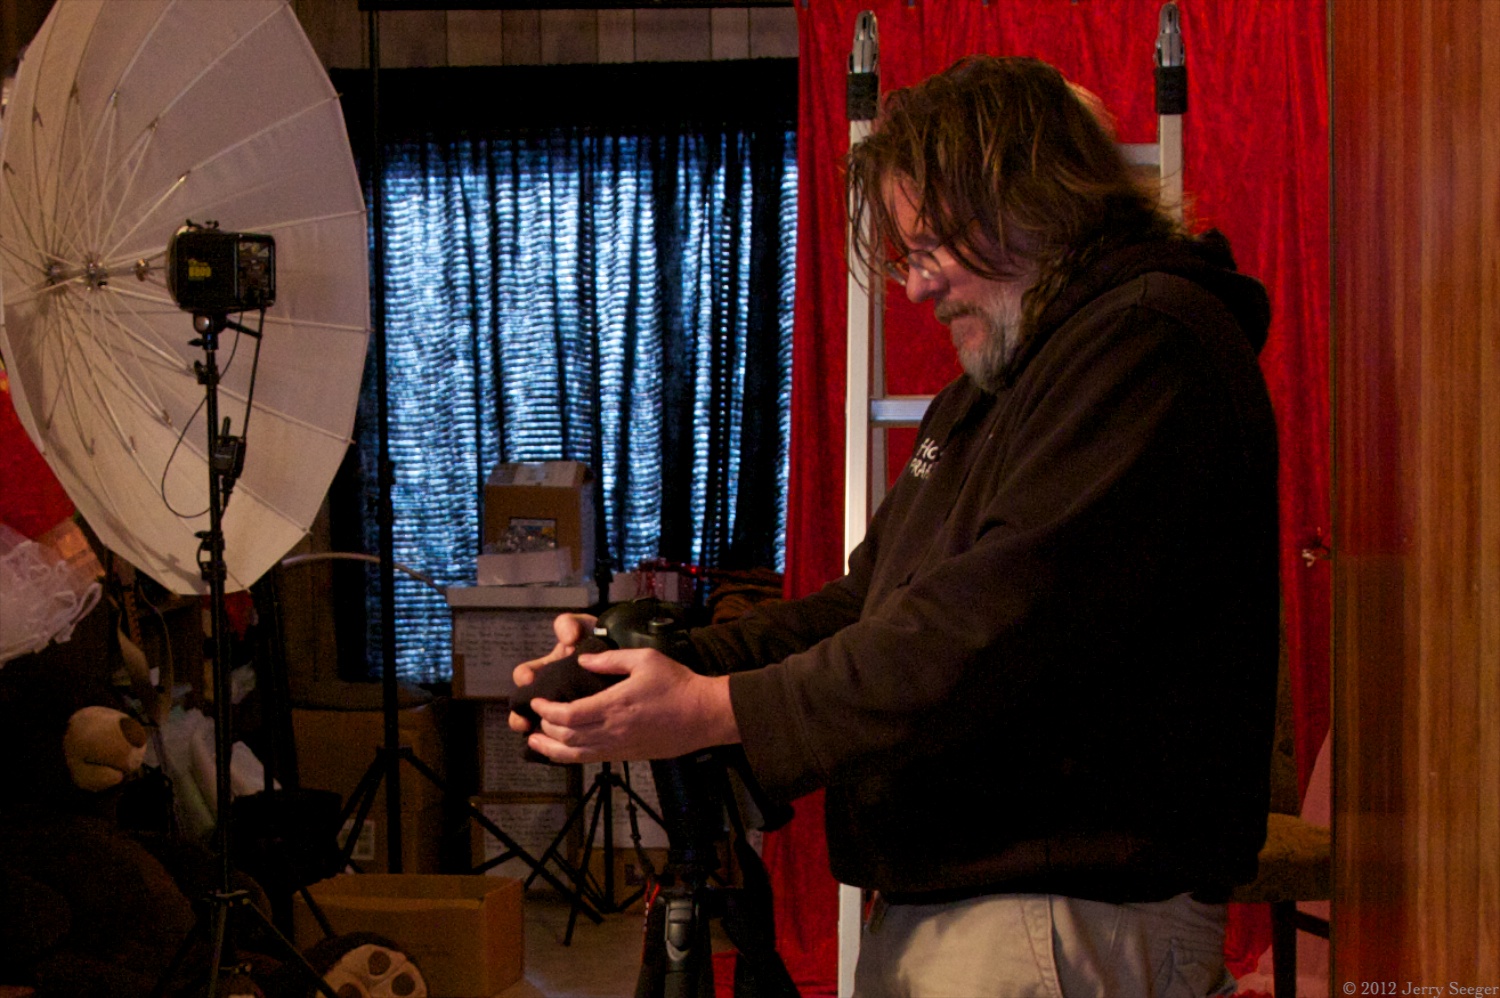
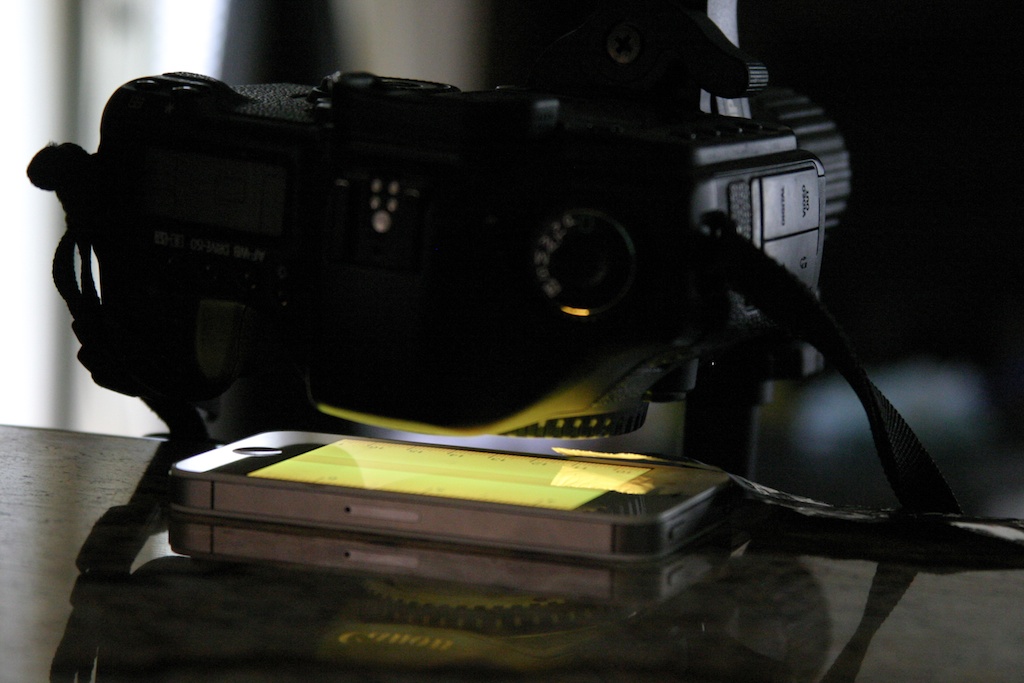
This weekend Harlean (who is a fiction) and I had a really fun photo shoot. We were using our Lensbaby gizmos for the first time, and allowed ourselves the emotional room to experiment and accept when things didn’t work right, and celebrate when changing something actually had the predicted result. A wonderful day in the studio.

There is a part of me that believes that getting good results with your current gear is an indication that you don’t need better gear. But over the years I have identified a few cases where new gear would be better. And heck, I used to watch a series on YouTube that included “Good Photographer, Shitty Camera” episodes where respected pros would be handed a Barbie doll with a camera embedded in her chest or a LEGO camera or what-have-you, and invariably these pros would manage to find a remarkable image.

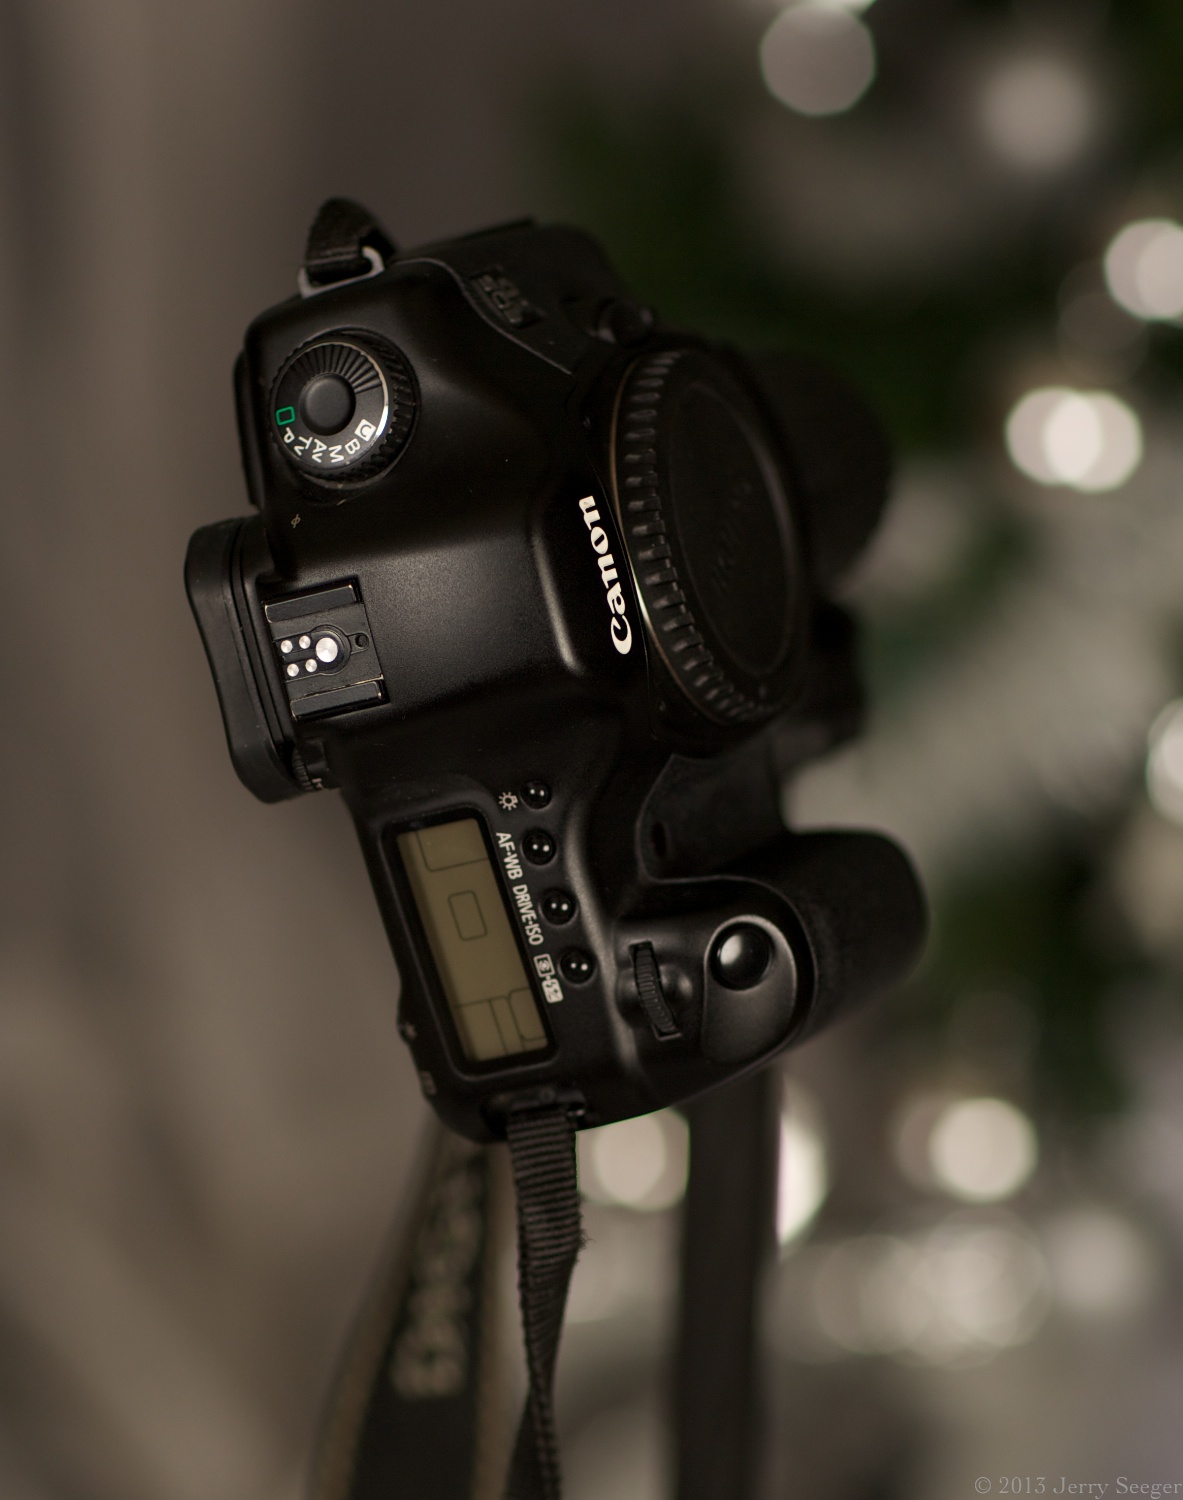
But none of them said, “I’m ditching my Nikon for Barbie!” Sure, some of those folks are probably still using Canon 5D Mark III’s, but I suspect not many of those do a lot of self-portraits. Here in this house the limitations of the 5D started to become apparent when self-portraiture became a regular occurrence. On the 5D, you have to make choices — not all autofocus modes work when you are using strobes or speedlights. Specifically, the autofocus modes that don’t require you to look through the viewfinder are absent. Additionally, the presence of the viewfinder itself can interfere with autofocus, as light coming in through the viewfinder can confuse things.

### For a bit here, I go on about Camera Stuff that is interesting (to me) and relevant(ish), but does not really build on the narrative of this episode. You could probably skip to the picture below if you’re not interested in the evolution of modern cameras or how that solves specific problems in our studio.

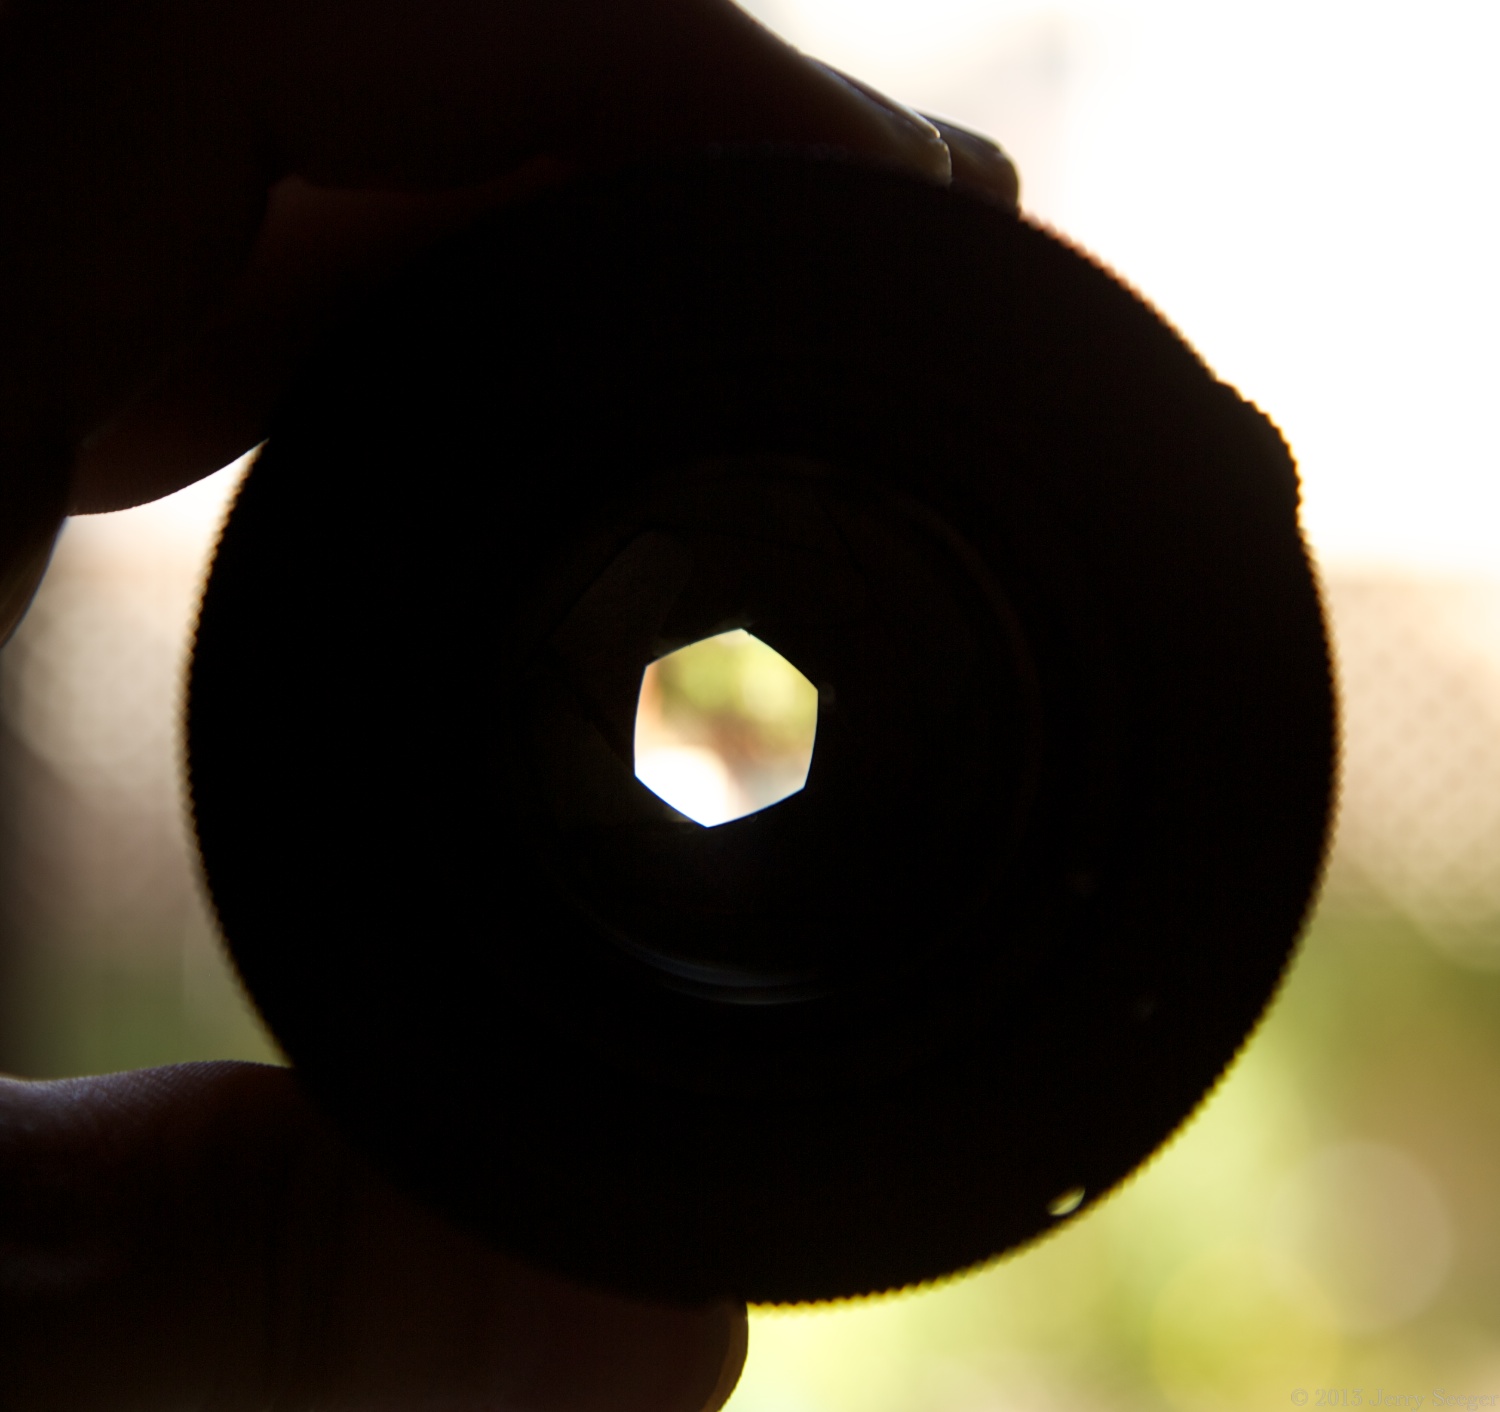
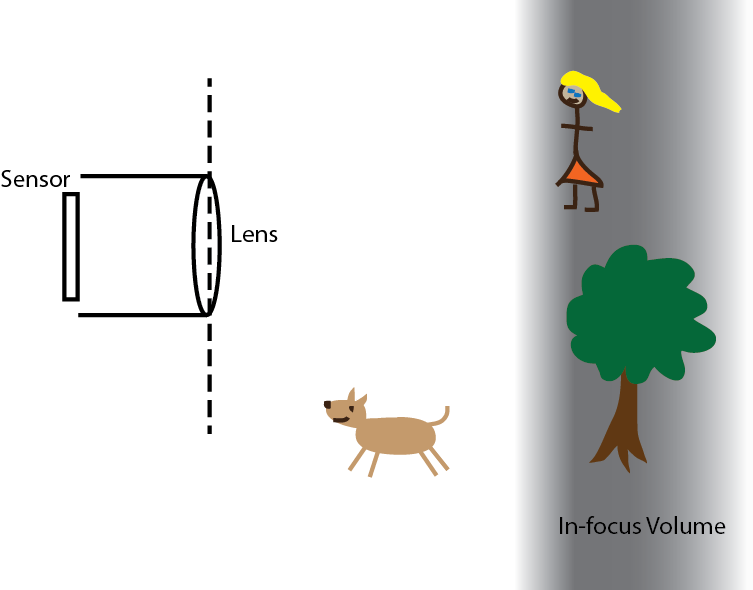
Anyway, at the heart of those problems is the very nature of the SLR itself. SLR stands for “Single-Lens Reflex” and is a system where there is a mirror in the camera that while at rest diverts the light coming through the lens up to the viewfinder. When you push the shutter button, the mirror snaps up out of the way and the light hits the sensor (or film) instead. It is the mirror snapping up and back that gives an SLR its distinctive shutter sound.

The reason some focus modes aren’t always available in our 5DIII is that those focus settings require computer processing to identify eyes, faces, and whatnot, and when the light is going to the viewfinder rather than hitting the sensor, that processing cannot take place. There is a mode that lifts the mirror to allow that processing, but then the camera can’t trigger the flash for “electronic shutter” reasons I don’t quite understand.

SLR was a big deal because it gave the photographer a much better idea what the picture was going to be like. Before that, the viewfinder had its own lenses, which tried really hard to match what the main lens would show, but as the “main lens” became ever more complicated, that became impractical.

But your phone doesn’t have a mirror in it, now does it? The light doesn’t need to be diverted to a viewfinder, the sensor chip itself sends that info to a screen. Then when you push the “shutter”, it sends a signal to the camera to take a much higher quality image off the same sensor and send off for storage.

All the big camera companies have lines of “digicams” that try to be better than a phone and easy to carry around and shoot with. They have the screen on the back, and depending on where you live, they might be legally required to play a recording of that SLR mirror-clack when they take a picture.

But until fairly recently, all the high-end gear continued to be SLR. Honestly, I know there were compelling reasons, but I’m not entirely sure what they were. But then Fuji and Sony made exciting high-end “mirrorless” cameras. As mentioned above, “mirrorless” itself wasn’t huge news, but now that word is used to describe the top-end gear out there that doesn’t have a mirror.

Canon responded with a thud, creating the EOS-M format, that utterly failed to establish them in this market. Maybe not a Zune-level flop, but in the neighborhood. Nikon did a little better, and Sony pulled ahead while Fuji found a very comfortable niche to totally dominate, while still pushing Sony.

Now, Canon and Nikon have stepped up their games, and Canon at least burned their boats on the shore. There will be no new major updates with a mirror from Canon, and no new lenses to fit their SLR line. It’s all about the R.

With that long-winded explanation, you might not have noticed that a mirrorless camera solves two of our current issues: “Aha! No optical viewfinder means no light leaking in from the eyepiece to mess up autofocus!” and (less obvious) “Aha! There’s no mirror! Sensor-based focus modes are available all the time!”

So, after one very frustrating shoot that might have been somewhat less frustrating with different technology, and two very smooth shoots to prove we deserved it, we helped pay off Canon’s gamble:

This lovely photo of our new hot-shit camera was taken with my phone.

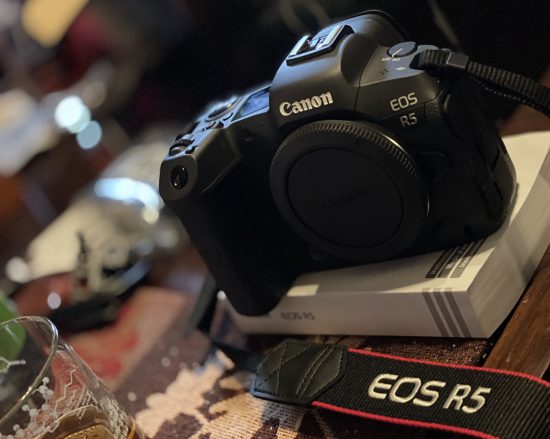
It is physically smaller than the 5D it is replacing, because there’s no need to make room for a mirror to flip up and back. The geometry of the mount means that lens makers can go crazy. Hopefully, somewhere at Canon is that troublemaker saying, “hey, remember when we did that 50mm f/1.0? We can beat that.”

So there it sits, radiating potential. In the camera world, as in computers, the chips are obsolete before they even land on your doorstep. I’m honestly surprised that the 5DIII is still not obsolete after eight years. But in photography the real investment is in the lenses. Camera bodies come and go, but glass is forever. Mostly. There are better versions of almost every lens I own made specifically for the new camera, but not enough better to justify replacement.

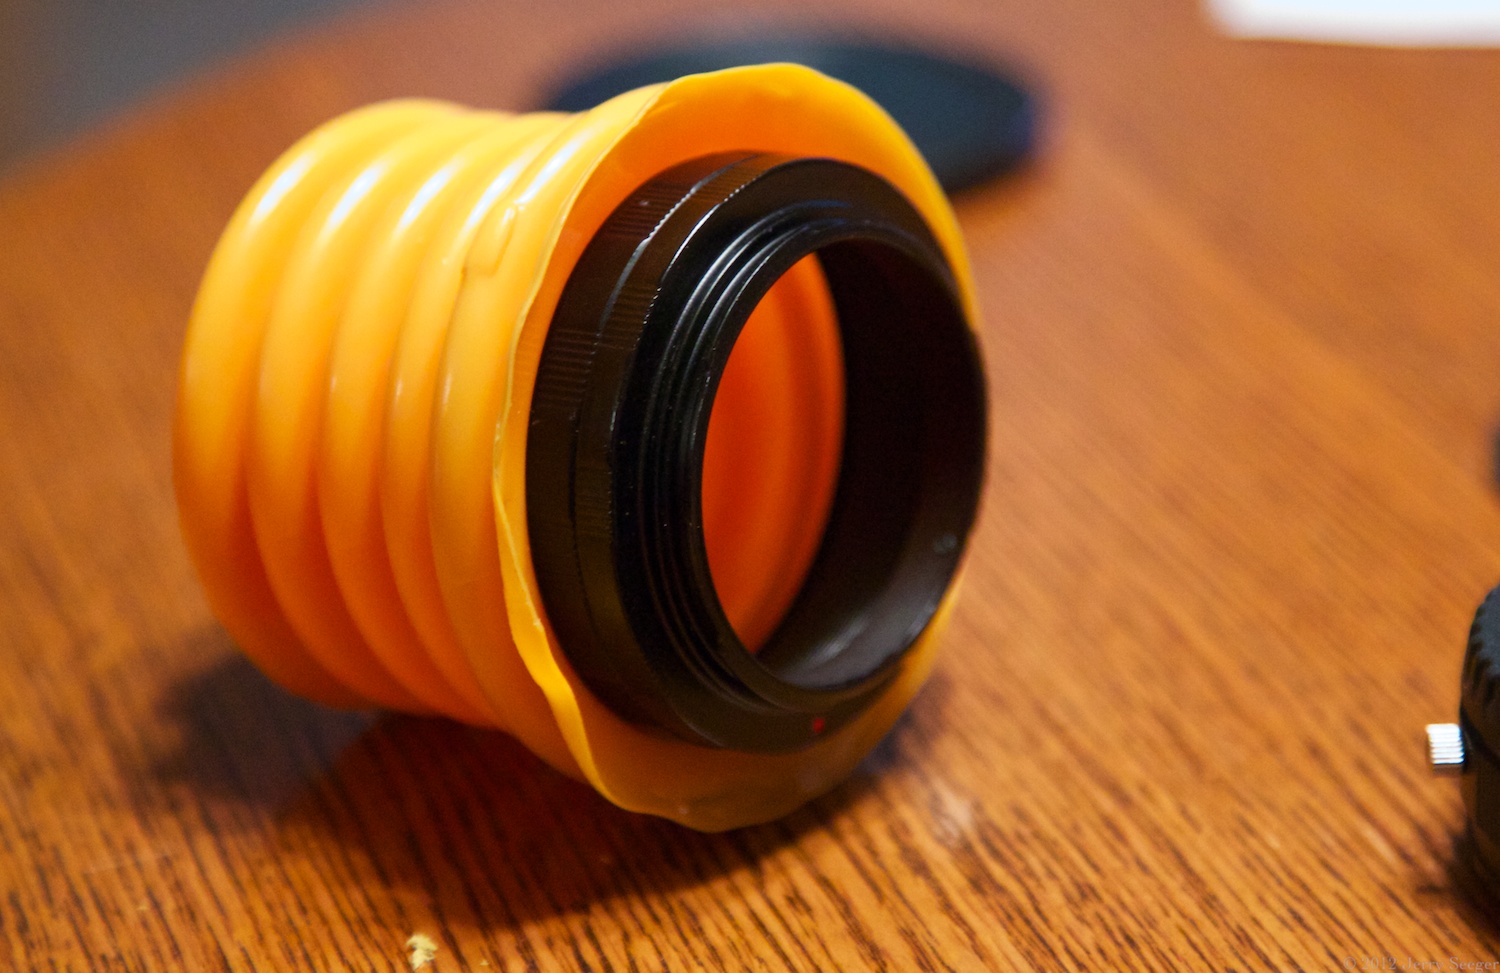
All one needs is an adapter to connect the old EF-mount lenses to the new RF body. (In fact, because of the new geometry, I can now attach other, non-Canon lenses I’ve long longed over. There’s a Minolta…)

Anyway, all I need is an adapter, and my library of lenses will be ready to go. That’s all I need.

The adapter is on backorder. Sitting in a box is a pretty dang incredible camera, and I can’t attach any of my lenses to it. The L-plate arrived today, so I have a lot of flexibility attaching the new camera to a tripod. Just… no lenses. I can hold it, I can admire it, but I can’t take any pictures with it. “Coming soon!” the reputable camera company says.

Not soon enough.

5

Serious Telephoto

This is about 1/3 of a camera I spent a summer serving. You might recognize it from the movies Contact and 2010: Oddesy Something-or-other, or maybe from the cover to that Night Ranger album you’d rather forget.

Not even sure how to calculate the focal length on this baby, but the aperture is measured in miles.

Not even sure how to calculate the focal length on this baby, but the aperture is measured in miles.

Note: You do not want to watch Contact when I’m in the room, unless you want to hear me complain at length about how that’s not really how a radio telescope works. I can’t help it!

I was just a lowly grunt at the VLA, but I worked the quiet night shift and when data came off the antennae and passed through my system (using a special memory array to accomplish fast Fourier transforms on the data to convert it from time-based to space-based), I would become the first human being ever to see Things Out There.

Yeah, chills.

I’m pretty sure that specialized, really expensive piece of hardware could still outperform my phone for that one specific task. Probably. But then again game engines use that same math, so maybe not. The PDP-11’s that fed the data into and took the data out of the array were what once was called minicomputers before microcomputers ate them for breakfast after Moore’s Comet hit.

I spent free time working on the Silicon Graphics workstation to make false-color images that looked cool — uh, I mean, enhanced the features the scientists wanted to study.

I have some OK gear of my own now, but I won’t be photographing quasars shooting out gas jets the size of galaxies.

If you’re ever on a road trip across the southwest, I recommend highway 60 for Salt River Canyon alone. On your way through New Mexico be sure to stop off at the VLA and walk around a bit. It’s a hell of a camera.

3

Rethinking Apertures

This is filed under the long-neglected ‘Get Poor Quick’ category, but the means of getting poor follows a discussion of camera lenses in general, with an emphasis on bokeh. Follow me and we’ll turn the whole industry on its head!

I was futzing around with the ol’ camera today, playing with my MIR-24, an older lens in which the Russians one-upped the prestigious German lens they were copying. I wasn’t trying for great photography, I was getting to know my lens by taking a bunch of pictures. It’s a fun lens when one has the time to manually get the focus just right. Here’s one of the shots I took (click to biggerize):

FR5A3546

One of the things I like about this shot is the way the fore- and background are interesting without being distracting. I took the shot with the lens wide open, which narrows the range that is in focus, and makes the foreground and background nicely blurry.

Different lenses will blur things differently; the quality of the blur is referred to with a word bastardized from Japanese, “bokeh”. Good bokeh is often described as “smooth”, while “jittery” is often used to describe bad bokeh.

But neither of those words actually describes what qualities make bokeh good or bad, just how it makes us feel. There is one generally-accepted reason bokeh is good or bad, and two others that are just as important but are not mentioned nearly often enough. I’m here to straighten that all out. You don’t have to thank me, it’s what I do.

So let’s think for a moment about what blur actually is. An image is blurred when light from one point in the subject covers more than one point in the image. Think about pictures where lights in the background turn into little circles. Or, if you don’t want to take the trouble to think, here’s an example:

FR5A0060

Note that points of light in the background of the above image are turned into circles. This is a projection of the aperture onto the camera sensor. If you look really closely, in fact, you will see that they are not quite perfect circles, but rounded octagons. The lens I was using has an eight-blade aperture control.

[Side note: When I’m watching TV now, I always take an interest in the shape of distant lights during night scenes. I bet an experienced cinematographer could tell you exactly what lens is being used just by that shape.]

Everyone agrees: the rounder the aperture, the smoother the bokeh. This is mostly true, but it’s far from the whole story. Here’s a look down the barrel of my MIR-24:

FR5A3574

The aperture is a hexagon, and not a terribly symmetric one at that. So, as the lens is stopped down (the aperture is closed) the bokeh will start to look edgy, and the dots from distant lights will be hexagonal. (The shot of the critters above was with the aperture all the way open; the blades are pulled out of the way entirely and the aperture is a nice perfect circle.)

Before we go on, let’s have some fun with aperture shapes!

Just because there’s an aperture control inside the lens, doesn’t mean we have to use it! Here I shoot with my beloved 85mm f/1.2, wide open in all these shots. But in the second shot, I’ve added my own homemade aperture in the shape of a triangle. (I wanted to do a fancier shape, but I’m not that good with the x-acto.)

You can get kits with all sorts of fun shapes, or you can get a camera lens with my new idea built right in. (Well, you might have to wait a while for option b.) Read on!

Back to bokeh. We have the generally-agreed-upon axiom that round apertures make better bokeh. But there’s another factor: The structure of the dots themselves. Some lenses produce nice, even dots, while others produce dots with a bright rim around the outside. And you can see that my homemade triangle aperture produced pretty significant ghosting. Both those things will add to the general unpleasantness of the blurry parts of your photos. So don’t assume that that old lens with the 20-blade aperture that’s nearly a perfect circle at any f-stop will automatically give you good bokeh.

Then there’s the one factor that no lens can compensate for (yet…). Sometimes the subject matter just doesn’t blur well. Here’s a picture that demonstrates a couple of annoying bokeh traits even when the lens is doing its job relatively well:

FR5A1629

The first bokeh annoyance is the fungus in the background. The fungus is very structural, but the way it blurs just doesn’t feel natural. Behind the fungus things get muddled but also don’t feel quite natural. To see why the blur came out the way it did, consider the blade of grass that goes diagonally behind the flower. It is blurred into a perfect, straight, well-defined, sharp-edged area of doubt and uncertainty. All the things that go into a traditional aperture to create “good” bokeh sometimes produce a result that doesn’t feel natural. Lines get exaggerated rather than softened. The line of the grass becomes a line of circles, the light evenly distributed.

The big distracting leaf in the foreground cannot be blamed on the lens, alas. You have no idea how many different crops I tried to get that MF-er out of there.

OK, we’ve finally made it to the get-poor-quick part of this episode. You see, I have come up with a way to control the aperture of the lens that solves ALL the above problems: the aperture can be perfectly circular at any f-stop, or it can have any shape the photographer wants.

The blur in a traditional lens has hard edges because the aperture has hard edges. Metal blades close and open to allow more or less light into the lens. But what if the aperture were not hard-edged? What if the hole that let light through tapered off in opacity toward the edges? Those circles projected onto the sensor would taper as well, softening the edges of the circles, and therefore softening the bokeh. It would look fantastic.

All we have to do is get rid of those dang metal blades and replace them with a ridiculously high-resolution grid of pixels that can be set on a continuum from completely transparent to utterly opaque. The rest is software.

I know that is easier said than done, and even with the march of digital progress the resolution required for this project (a couple of orders of magnitude better than what we could do now – getting down to an almost atomic scale) is a long way away. Or maybe, (better yet!), it’s not digital at all and an electric field could be applied to a film of material that controlled its opacity.

Eventually a system like this will be far cheaper to manufacture than a mechanism with servos and metal blades, and it will add a softness to pictures that can only be dreamt of today.

1

Make Your Own Tilt Lens!

I first became aware of tilt lenses when I stumbled across the site for a company called Lensbaby. They have a whole bunch of specialty lenses, but they got their start making an inexpensive lens that you could tilt as you composed your shot.

Why in God’s Green Acres would anyone want to do that? Well, normally, one keeps the plane of the lens exactly parallel to the plane of the sensor, and out in front, everything at a particular distance is in focus. You can think of the volume of space that’s in focus as a rectangular solid with one face parallel to the sensor.

When you tilt the lens, the rules change. The volume of space that’s in focus tilts too (there’s a rough formula, but the math’s not important here). To illustrate, let’s take a look at figure 1. In this diagram, the lens and the sensor are parallel, and the zone in front of the lens that is in focus is parallel to them as well. The girl and the tree are in focus, but the dog is not.

Figure 1: diagram of a photo shoot in a park. The girl and the tree are in focus.

Figure 1: diagram of a photo shoot in a park. The girl and the tree are in focus.

Of course, dogs and girls are much more interesting than trees. How can we get them in focus, and get the tree out of focus so the shot doesn’t seem as cluttered? One way is to tilt the lens.

Figure 2: The same setup, but with a tilted lens.

Figure 2: The same setup, but with a tilted lens.

Lensbaby’s products cost substantially less than high-end lens systems, in part because they’re optically pretty low-grade. Still, a few hundred bucks for a set of flawed lenses (even if the flaws are embraced – more on that later), seems a little steep. After poking around a bit, I found sites for people who made their own tilt/shift lenses for just a few bucks. (There are plenty of other links where that one came from.) I decided to try my hand.

Medium-length section of macro extender tube set

Medium-length section of macro extender tube set

After considerable pondering, I realized that there were a couple of ways I could improve on the designs illustrated, at the sacrifice of a couple more bucks. All those designs involved drilling out a camera body cap to provide the attachment point to the camera. I opted for a cheap Chinese extender tube ($6) to give a much larger surface for mounting the bellows.

Next came the hunt for an appropriate lens. Many of the people who build these buy old, crappy lenses for SLR’s and partially disassemble them to allow clearance between the bellows and the camera body. Others use medium-format lenses, which generally are designed to be mounted farther from the film. Despite reports that these could be found on the cheap, I was not successful in my search. Eventually I stumbled on a Federal Anastigmat lens for $20 and decided that was an acceptable amount to risk.

I got really lucky.

The big investment - the lens.

The big investment – the lens.

I’m pretty sure the lens was originally intended for a photo enlarger rather than a camera, but hey, you need quality optics on that end of the processing, too. Where I really got lucky was with the focal length. I hadn’t given it much thought, but it turns out that lenses like this come in a pretty wide range, and 3.5″ turns out to be close to ideal for my lens design. See the end of the article for tips on how to find a similar lens.

Mini-plunger with bellows construction.

Mini-plunger with bellows construction.

The lens sat on my desk for a few weeks, but recently I decided it was time to get this puppy made. I went down to Home Depot and after a period of wandering found the plunger section. I wanted one that had a bellows style of construction, rather than the typical rubber dome. Happily I hit pay dirt (with a caveat).

I brought the plunger home and after considerable time pondering how best to attach all the pieces together, decided to stop thinking so much and just see what I could come up with. It was time for action!

I started by trimming off the part of the plunger bellows that was clearly too wide.

Trimming the plunger

Trimming the plunger


It turns out that that particular extender tube and that particular plunger fit together perfectly, though it took me quite a bit of fussing before I discovered the proper technique for mating the two. After futzing with screwdrivers and pliers (whose scars you can see in the final photos), I just put my weight into it and mashed the thing home.
The macro tube and the bellows mated.

The macro tube and the bellows mated.
You can see how much light comes through the plastic.


To attach the lens to the bellows I used a roto-tool and gradually enlarged a hole in the handle end of the plunger until the threads of the lens could bite and I just screwed the thing straight onto the plastic. It’s a lot more secure than I expected it to be.
The finished product!

The finished product!


And… that was all there was to it. But, alas, there is a problem. A lot of light gets through the plastic. The first pictures I took had low contrast and a decidedly orange cast to them.

Wrapping something dark around the bellows helped immensely. Here I am taking a tilt-shot with my neoprene knee brace pulled over the lens. Some orange still leaks in through the front plastic, but contrast was improved dramatically.

Taking a tilt-lens shot

Taking a tilt-lens shot


Once color-adjusted, the results are pretty interesting. In the following photo you can trace the volume of focus from the lower-left right back to the napkin holder in the upper right. One side of the glue bottle is in focus, while the other isn’t.
Tilt-lens photo with skewed focal plane

Tilt-lens photo with skewed focal plane

To be honest, I’m not sure exactly what I’m going to do with this thing now that I have it, but the first step is to take a whole ton of practice photos, so when the time is right I’ll be ready.

The biggest disadvantage to this setup is that it takes three hands to take a picture, and since you’re holding the lens steady with your fingers, fast shutter speeds are advised. Some of the lenses in the article I linked to lock down the lens at the desired angle, which would be handy. Lensbaby’s design is structurally pretty similar to mine; they have a version with screws that hold the lens in position.

Another thing about the “anastigmat” lens I used and the offerings of Lensbaby: My little lens is optically quite a bit better than Lensbaby offerings, for better or worse. Anastigmat was a name many lens manufacturers applied when they came up with ways to reduce the spherical aberration and astigmatism of early lenses. Lensbaby, on the other hand, embraces spherical aberration with gusto. This causes the focal zone in the illustrations above to be curved and the edges to be distorted, which can also be fun, and can really pin interest on your subject. The rear elements of my Federal lens can be removed, which I think will give me some pretty major spherical aberration as well. We’ll see. Lensbaby also has a variety of other ways to introduce distortion into photographs, but I’m not going to start experimenting with that until I get the tilting business well under control.

“Anastigmat” is also your key to finding the right glass if you want to follow in my footsteps. Just type that into eBay’s search and you will find a host of old lenses, some quite cheap. (At this writing there’s a nice-looking Rival for $22 and a sort-of-slow Federal for $10.) Choose a focal length in the 90mm range and away you go! (You can use longer macro tubes if you get a longer focal length. $6 gets you a set of three different lengths that can be screwed together.) Some lenses look like they’re only the front element (just one piece of glass); you should stay away from those.

Total cost: $30. When I got down to doing it, it was pretty easy. If you like to tinker, this would make a great Saturday project that could pay dividends with interesting photos for a long time to come. Give it a try!

4

The Wanting and the Having

The other day I went online to learn more about neutral-density filters for photography. The idea is that sometimes there’s too much light, and to manage the light you can crank your lens down, limiting your creativity, or you can essentially give your camera sunglasses. I came across an article by an Australian bloke (rhymes with ‘guy’) who liked to use very very dark filters (“Black Glass”, he called them), to take super-sweet photos of running streams and things like that, using exposures that lasted minutes. A side effect of the technique is colors that reach out of the picture and slap your face.

I was distracted from my original goal of looking at less extreme ND filters, and found myself looking at cameras. The leap from filter to new camera is tenuous at best, but by God I made it.

The day before I had been looking at lenses that were pretty cheap with pretty impressive performance numbers. The catch: they were manual focus. My camera doesn’t have the parts that older cameras have to help a photographer tweak the focus. Auto-focus is so good these days that the extra cost of adding a split prism or whatever just won’t resonate with the typical purchaser.

But there’s another way to get good focus with old-fashioned lenses or practically opaque optics. Live View. Crappy little digicams have had live view for a while now, but for reasons I won’t belabor here, high-end SLRs have only recently gained this power. What it means is this: you can see the picture you’re about to take on the screen on the back of the camera. You can zoom in on the image, choose your favorite eyelash, and adjust the focus until it’s perfect.

My camera, snazzy though it is, doesn’t have Live View. For almost the same reasons, it doesn’t shoot video.

So I started pining for Live View. I have a lens that can really benefit from manual focus, and I plan to substitute pinholes for black glass. The Want took root in my soul.

Flashback: Several years ago, during year zero of the Muddled Age, I was sleeping on my cousin’s sofa in Bozeman, Montana. Let me tell you, there are things to photograph up there. I borrowed his gear for a visit to Yellowstone, got exciting results, and Cousin John set me up with my own rig while I basked in the euphoria of good beer and a few nice photos.

John is a Canon man, and he likes his toys. He filled up a shopping cart at B&H, I said “go”, and shortly thereafter I had a DSLR and three lenses. It’s worth noting that although he likes the high-end stuff, the camera he chose was entry level (though I couldn’t even tell that at the time). The main investment was in the glass, and those lenses have determined my course ever since.

I told anyone who would listen that the Canon 10D was more camera than I would ever need. Perhaps the Gods chortled. The 10D was all the camera I needed for many years, but through a series of events that could not be anticipated but must be appreciated, I began taking a lot of pictures, and I started to feel limited by my camera. No one was more surprised than I was, and no one was more pleased.

My upgrade was a big jump: 10D to a used 5D I bought off a coworker. Canon’s wacky numbering system goes 10-20-30-40-50-7-6-5-1. I think there’s a 60, too. Not all those numbers are available anymore. Anyway, I went 10D to 5D and it was a huge jump, and, gratifyingly, my pictures improved. I wasn’t just buying gear for the bragging rights.

Back to now: Honestly, I’m not feeling that limited by the 5D. It can take a pretty picture or two. But the 5D mark II has way more pixels, and Live View, and video. The person who sold me her 5D had just bought a Mark II. Now there’s the Mark III, out last spring to great excitement. It is a ridiculously awesome piece of consumer electronics. The biggest improvement over the Mark II: it’s much better in low light.

I started following Mark II’s on ebay. They are still manufactured, largely because people who have studio lights don’t need mark III’s most compelling feature. I have lights. I’m getting better at using them. Mark II is enough. Mark II is enough. Mark II is enough.

But you know what? I shoot other places than the studio. Sometimes I don’t control conditions and I have to adapt. A more versatile camera gives me more options. I spent ridiculous hours doing ‘research’, weighing the 5D Mark II, the 5D Mark III, and the brand-new 6D, which has some intriguing features. This research happened over the course of several nights after the light of my life had gone to bed, and resulted in what must have seemed a fiat to her: we need a Mark III. (Yes, “we”.) I haven’t hit the ceiling on the camera I have, and I was calling for a new one. A really expensive new one. I tried to play it cool, but inside I was a knot of commercial lust.

A funny thing happens when I relate this story to the folks around me: “At least you actually take pictures,” is the almost universal response. That I do, that I do. But I still feel something of the poseur when I indulge myself this way. I get good shots with the 5D I already own. It is for my own pride that I feel I have to develop my abilities to warrant carrying a prestige item like the Mark III. I can’t feel proud of owning it, that’s just a matter of spending money. That sucker’s in the mail now, and I better do something to justify holding it.

Also, I check the shipping status roughly every fifteen minutes. I’m giddier than a schoolgirl on free pony night.

2

Pinhole Fever

My favorite camera lens is a marvel of technology, an almost perfect example of science serving art. But lately my imagination has been captured by the other end of the lens spectrum: the pinhole.

The idea took root when I saw some russian plastic pinhole lens go on ebay for actual money. The sales pitch was, “recreate the look of this crappy old camera with your modern DSLR!” I agreed that would be a fun thing to do. We put distortion into electric guitar pickups and we dig lo-fi pictures.

But that’s selling the pinhole short. Last night I experimented with the lenses in my stable, determining the smallest details I could hope to resolve. I don’t have a true macro lens, but here’s the thing. A really good macro lens (hundreds or even thousands of dollars) will give you the ability to project images onto your film or digital sensor at a 1:1 ratio – if the thing you’re photographing is 1cm, it will be 1cm on your sensor. With a modern camera, that translates to a whole bunch of pixels.

But wait! With a pinhole, at the cost of maybe two dollars (10 bucks for better image quality) you can get a magnification five times that. Obviously not with the same fidelity, but seriously, five times the magnification means that you can still resolve some amazing details in your subject.

I think a pinhole would also be a better lens for observing the sun than any I currently have in my arsenal.

All that on top of cool vintage-looking shots in the “normal” range. Your subject has to be able to hold still for a while; the pinhole allows much less light through than a typical glass lens. You could argue that the primary function of the glass in lenses is to allow you to have a much bigger pinhole and still be able to focus.

And here’s a fun fact: All those numbers that we use when talking about a lens are actually based on pinholes. When we say a lens has a 50mm focal length, what we mean is that it acts like a pinhole 50mm from the film. The other numbers are similarly derived.

For a given focal length, there is an ideal pinhole size. (OK, that’s not exactly true, but there is an ideal pinhole size to optimize the shot for different preferences.) The goal is to have the light that comes from a specific point on the subject strike a particular point on the sensor. As you can probably imagine, the smaller the pinhole, the smaller the dot of light on the sensor from any given spot on the subject. (This dot is called, rather poetically, the “circle of confusion”.)

So the smaller the better, right?

Not so fast, Sparky! Just when you least expect it, light starts behaving like a wave, and the smaller the pinhole, the more pronounced that effect becomes, until diffraction causes the light from that single point outside the lens to turn into a bright central dot surrounded by fainter rings. The trick then is to minimize the distortion caused by both a too-big and a too-small pinhole, and find the happy balance. Others, happily, have done the math, though they don’t all agree.

I have a plan. I’m going to create two pinholes of different sizes, and mount them on the kind of cap you put on your camera body when you don’t have a lens on it. The caps are already made to attach the same way the manufacturers lenses do. I also intend to make an extension tube that mates with the camera at one end and with a lens cap at the other (using the cap that goes on the back of lenses for storage), and have myself a macro/zoom pinhole. The little pinhole can either go directly on the camera for a 46mm focal length, while the larger pinhole one goes on the end of the tube for telephoto. With the small pinhole on the extension tube, you’re ready for serious macro photography.

I’m fascinated now by the question, “what can a really well-engineered pinhole accomplish?” Besides just getting the size of the hole right, there are the challenges of getting the hole nice and round (irregularities will play hell with diffraction) and shallow. If the hole is too deep (drilled through too thick of material) the corners of the picture are cut off. The camera will quite literally have tunnel vision.

I intend to spend some hours in Father-of-Sweetie’s workshop, experimenting with drilling holes in metal. (I priced out copper sheet and then realized that drilling holes in money (pennies) would be much cheaper.) The first thing to discover is whether it’s merely difficult or completely friggin impossible to get a drill to stop when its tip is 0.09mm through the metal (for the smaller hole, assuming the standard 118º point angle of the drill’s tip), and if the resulting hole is round enough. If not, then micro drills are going to be required.

While I don’t mind spending a great deal of time building the thing, I’d like to come up with a process that can be repeated fairly easily. Because if people are willing to pay for a little plastic piece of poo, there might be a group of hobbyists interested in the Ridiculously Over-Engineered Pinhole System. If I can drill the holes efficiently, it might make a nice little cottage industry.

Bonus!

In between the time of writing and the time of posting, there was a time of doing! Here are some results with Quick and Dirty Pinhole 2 (pinhole 1 didn’t pass quality checks):

A few notes:
What I set out to do this morning was discover if I had any way to measure the size of the pinholes, and to see if they were actually round. I don’t have a fancy loupe, and the ones that can measure down to things that tiny are quite expensive. I do have a camera, however, and I figured if I could get close enough I could use an image to measure the size and shape of the pinhole.

I made a couple of pinholes in tinfoil. I used my fisheye lens to get down as close as I could to the pinholes (laid on top of a ruler app on my phone) and was able to roughly estimate their size. The first was definitely too big, the second seemed only a little bit too big. So I drilled a hole in a Canon body cap and taped in Quick and Dirty Pinhole 2.

Most of the exposures you see here are thirty seconds, at pretty high ISO to boot. the f-number for QDPH-2 is something like 48mm/0.3mm ≈ f/150. Remember how giddy I was to get a lens that went to f/1.2? Yeah, this is the opposite of that. Such is the way of the pinhole. The side effect of that is that just about everything in the universe will be in focus, including things that are really really close.

Yep, the best tool I have for measuring pinholes is… a pinhole, and the marks on the measuring stick are the pixels of the retina display itself (12.8/mm). I am stoked.

In the last macro shot of QDPH-1, you see some ghosting. I’m pretty sure that was caused by light bouncing back and forth between the two pieces of aluminum foil. In shots of the display only, there is no ghosting.

But, my sweetie asked this morning, what’s the point of all this? My answer: It’s fun, and also I think we can get some great vintage-feeling shots. As you can see in the still life, the focus is pretty soft – not appropriate for all the hard-edged items in the shot. I’ll be taking some self-portraits later to see how that goes.

2

A New Toy

When I got home from work today, I was beat. Plum tuckered out. I came in, hugged my sweetie, and plopped in front of the computer. Then she told me about the package in the living room. Suddenly I had a new burst of energy, and I spent the evening photographing stuff around the apartment. Anything that would hold still, really.

You see, there’s a camera lens I’ve been looking at for a long time. Sometimes I’ll even look in on eBay to see if one is going for less than usual. Last week, I found one at a good starting price. No one had bid. It was a few hours before the auction ended, but for stuff like that all the action happens in the closing seconds. Still, I set an alarm for a couple of minutes before the auction ended. If I wasn’t busy doing something else, I’d look back in and watch the action.

No one had bid. Time was winding down and no one at all had bid on the lens. It was more than I could afford, more than I had any business spending. The seconds ticked down in red digits. An appeal to my sweetie followed, hoping for reason but dreading reason far more. My finger was on the button, ready to pounce.

I bid. I won. I have a new lens. It’s awesome.

A little camera geekery: photography is filled with numbers, and this lens has one eye-popper: f/1.2. The smaller the number, the ‘faster’ the lens – the more light it gathers in a given period of time. 1.2 is a very small number, meaning this lens can open way up and take in a lot of light. That in turn means it works very well in low-light situations. That can be really handy when it’s not practical to lug lights to where the action is. There’s another side effect of this gaping aperture, and that is that the depth of focus can be very, very shallow.

Depth of Focus is a little tough to explain because we don’t experience it with our eyes – they are constantly refocusing on whatever we’re interested in at the moment. But the concept is really simple. When things are too close to the lens, they go out of focus. Too far, out of focus. Then there’s a middle range where the picture is sharp. With some lenses that middle range is so huge that pretty much everything is in focus, unless it’s really close. That’s a good quality on an instamatic with fixed focus. The lens trades off in other ways to get that effect, but for taking pictures at the beach it works pretty well.

My new lens is at the other end of the spectrum. Consider these two pictures I took while sitting a few feet back from my desk (you can click to see them larger):

my mug, focused on the front of the rim

my mug, focused on the front of the rim

my mug, focused on the back of the rim

Even from a few feet away, the depth of focus is maybe three inches. Those candles are about four inches behind the mug.

Why would anyone want a lens with such a restriction? Holy carp, it can be pretty tricky to get the focus just right when there’s so little room for error. You could seriously get one of your subject’s eyes in perfect focus, but not the other.

But look how the mug is not lost in the clutter of my desk. Those are pictures of my mug, and nothing else gets in the way. I have pictures of rock stacks on rocky backgrounds, and headstones in a cluttered graveyard that could really have benefitted from this technique. When things are similar color or texture as the background, focus can make all the difference.

My sweetie was laughing at me as I drifted around our apartment, which is currently in a state upheaval for our move, taking pictures of this and that. I wanted something sparkly. I found it in the living room, where this teddy bear also lurked.

My first portrait subject with my new 85mm lens.


It’s not just that things are out of focus, it’s that they’re beautifully out of focus. Note how deliciously soft the candles are behind my mug. In this shot, I had to choose what point on the bear’s face I wanted to focus on – note that the closer ear is in the soft-focus zone.

Why did I want sparklies? It’s a good way to show the bokeh, or the characteristic of the way the lens blurs the image. My new lens is carefully built to provide smooth, circular bokeh. This is a function of the way the aperture control works – the dots are actually projections of the iris mechanism inside the lens. Often they are hexagonal or another geometric, unnatural shape. It’s most obvious for the sparkles, but it affects the rest of the shot more subtly as well.

I’m sure that somewhere in my great heap o’ pictures I have some that demonstrate other bokeh, but I’m not sure where. I could go digging, but tonight is about the new lens.

The new, awesome lens.

2

Can Someone do me a Favor?

It’s not a big deal; I just need someone to remind me that I do NOT need the Canon 85mm f1.2 L II lens. Really, I don’t. It doesn’t matter that this lens allows one to shoot with incredible control over the depth of field, nor is it important that the almost-circular aperture produces lovely “bokeh” (the highlights in the out-of-focus region are often hexagonal or octagonal in most lenses, projecting the shape of the aperture inside the lens). On top of that, I have lights now, so the excellent performance in low light is not nearly as important as it once was.

And 85mm is too long for most of the shots in our little “studio” (which resembles a living room much of the time). Sure, when I get in close for some of my favorite shots there may be no better lens on the planet, but that’s — what? — maybe 20% of my total on a typical shoot with Harlean (who is a fiction). Maybe even less.

Sure, if I were to start taking pictures of other, less fictitious models, in roomier conditions, and if I had the skill and could control my light well, then this lens would be the crown jewel of my little collection.

But I don’t. And I’m not. So, could someone out there remind me that I really don’t need that dang lens?

3