
One of the big-ass hard drives we use for backup has started to make scary noises. Not the kind of sounds you want to hear from a drive that holds important data for our family and for a few of friends around the country as well. It was time to start looking for a replacement drive. One thing I wanted to do was have a clear upgrade: with the new setup I will not have to fear the catastrophic consequences of a single drive failing.
A note on levels of catastrophe: some might think that losing backup data is an inconvenience. In the same way you could think that losing the co-piolot of an airplane is an inconvenience. But with the backup compromised, risk of disaster has gone up exponentially. At Muddled Ramblings and Half-baked Ideas we take that shit seriously as we skulk in our secret bunker, buried deep beneath a trailer park next to a sprawling cemetery, ready for the Zombie Apocalypse to begin.
There are fancy enclosures that hold several drive units and use a variety of schemes that fall under the general acronym RAID to protect data from the failure of a single drive. Most of those enclosures have loud fans, and all of them cost a lot of money. Where does a cheap bastard go when he wants RAID 5, quiet and cheap? He buys a bunch of inexpensive but high-quality disks, puts them in inexpensive but high-quality quiet enclosures, and uses SoftRaid to turn them into a single virtual disk with reasonable protection from disaster.
After a little research, I found the right drives (Seagate bulletproof datacenter-rated blah blah blah) and the right enclosure: the iomega Mac Companion. What is great about this enclosure is that it has TWO firewire connectors, so you can daisy-chain them and connect many drives to a single firewire port on the host computer. Music to cheap-bastard ears, and not found on other enclosures at any price. Plus, you can buy them cheap on eBay in any quantity you might want, while supplies last.
There’s a catch, of course: iomega is defunct, and never officially sold this enclosure without a drive already installed. The packaging looks as though they might have been planning to sell empty enclosures, but the documentation (and even some of the text on the box) is clearly written with the assumption that the drive is already in there and everything is assembled.
So, you have packaging clearly designed to contain an empty, partially-disassembled hard drive enclosure, and instructions clearly for a pre-assembled unit. Weird. Perhaps some last, desperate attempt to sell an inventory of enclosures the company could no longer afford to fill. The only intern left to handle the packaging had no idea what to do about the instructions. We’ll never know the whole story.
But there’s a glut of quite capable hard drive enclosures out there now, and I bought some of them. As for assembly, there are no instructions. Not in the box, not online. You’re on your own, buddy. Until now! By my third enclosure, assembly was actually pretty easy. As a public service to anyone else who might have jumped on this deal, here are step-by-step instructions. You don’t have to thank me, it’s what I do.
Step 0: Survey the stuff.
When you open the box you will see parts in two groups: the top and the bottom. The bottom section includes the plastic base, the metal housing, and the circuit board, which is attached to the bottom of the aluminum inner shell. The top section has an aluminum inner shell top and the plastic lid for the enclosure.
Let’s take a moment to visualize the final product. A hard drive mechanism, inside a protective metal inner shell, inside a sturdy enclosure with lights on the front. With that in mind, we will be building from the middle out. (Yes, I thought of Silicon Valley when I wrote that.)
Step 1: Start by disassembling the bottom parts even further. Carefully pop the plastic base out of the outer metal housing, then slip the circuit board with inner shell off the plastic base. This is the step that took me three tries to learn. After this, everything is actually pretty obvious.
Step 2: Set the hard drive onto the white shield over the circuit board and slide it forward onto its connector.
Step 3: Slide the top inner shell over the drive unit with the little pigtail cable sticking out the slot in the side. At this point, you have something that looks like this:
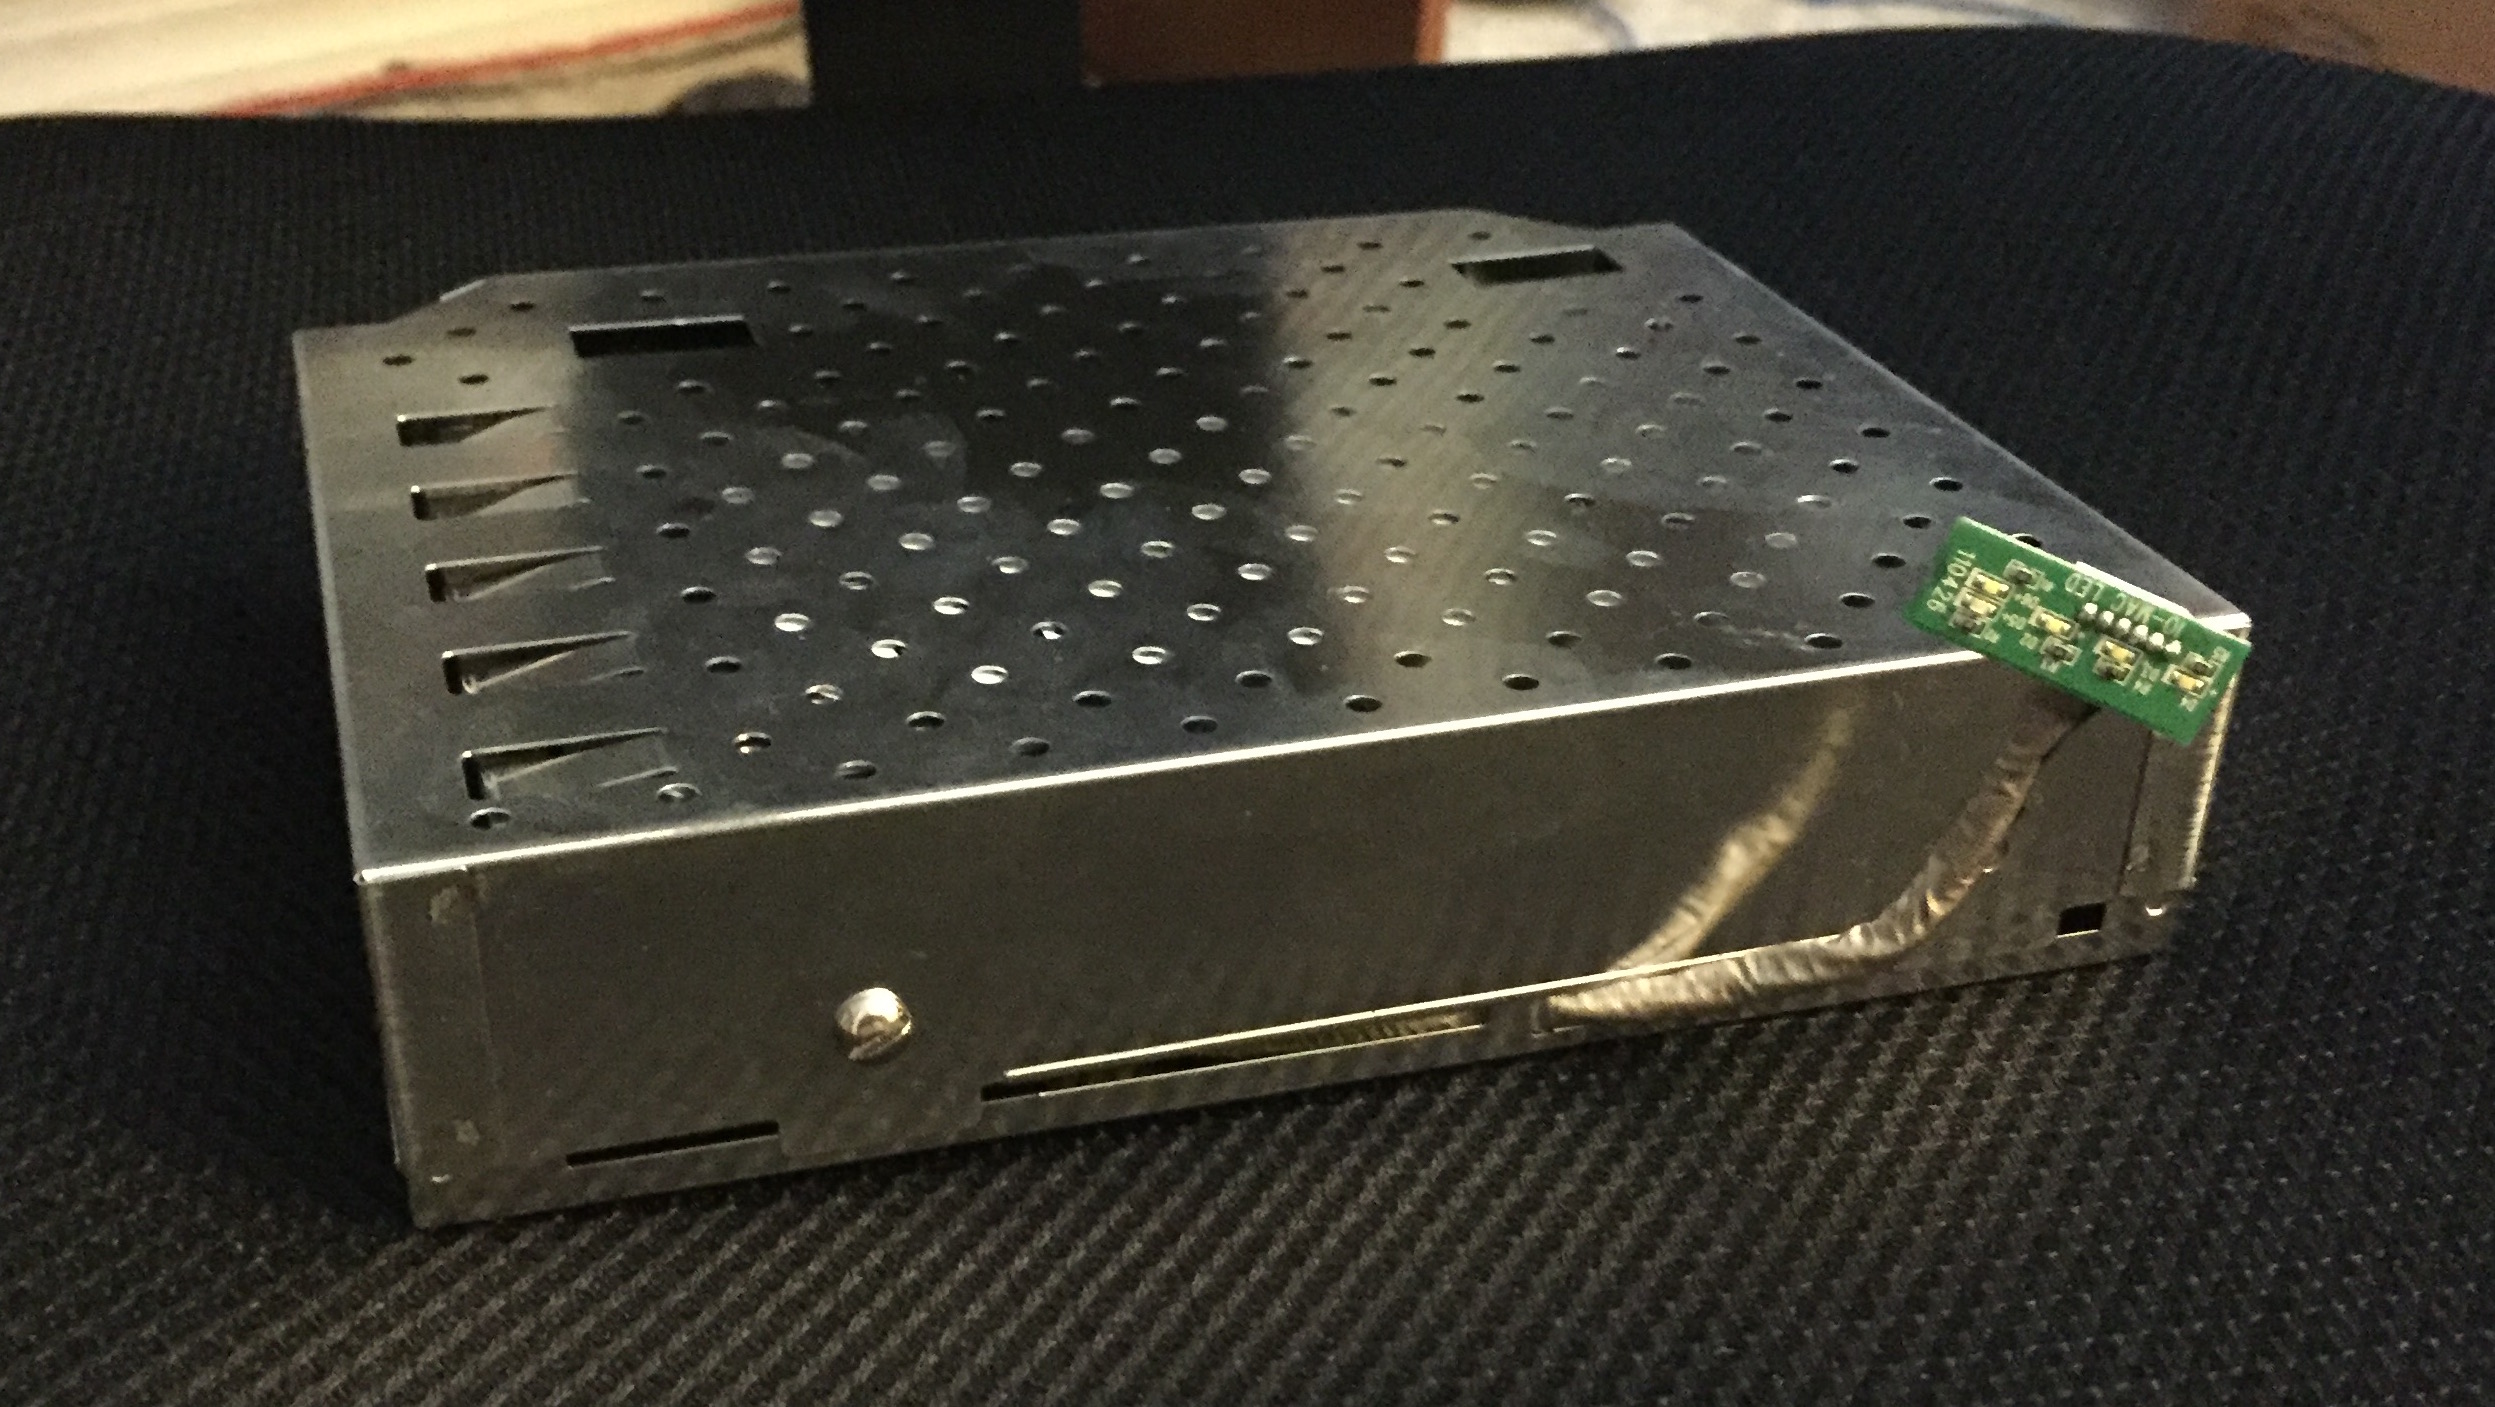
Step 4: If you look at the picture, you will see a screw holding the drive in place. The enclosure does not include the screws, but they are a standard size. I’m not sure what size, because I had some in my hardware collection, but you can figure that part out. In fact, in the first drive I assembled, I didn’t use any screws at all. I resolve to not use that drive as a maraca, and all will be well. But if I had it to do all over again, I’d screw those bad boys down.
Step 5: Slip your well-shielded hard drive assembly back onto the plastic base. Fiddle with things until the connectors line up with the holes in the base.
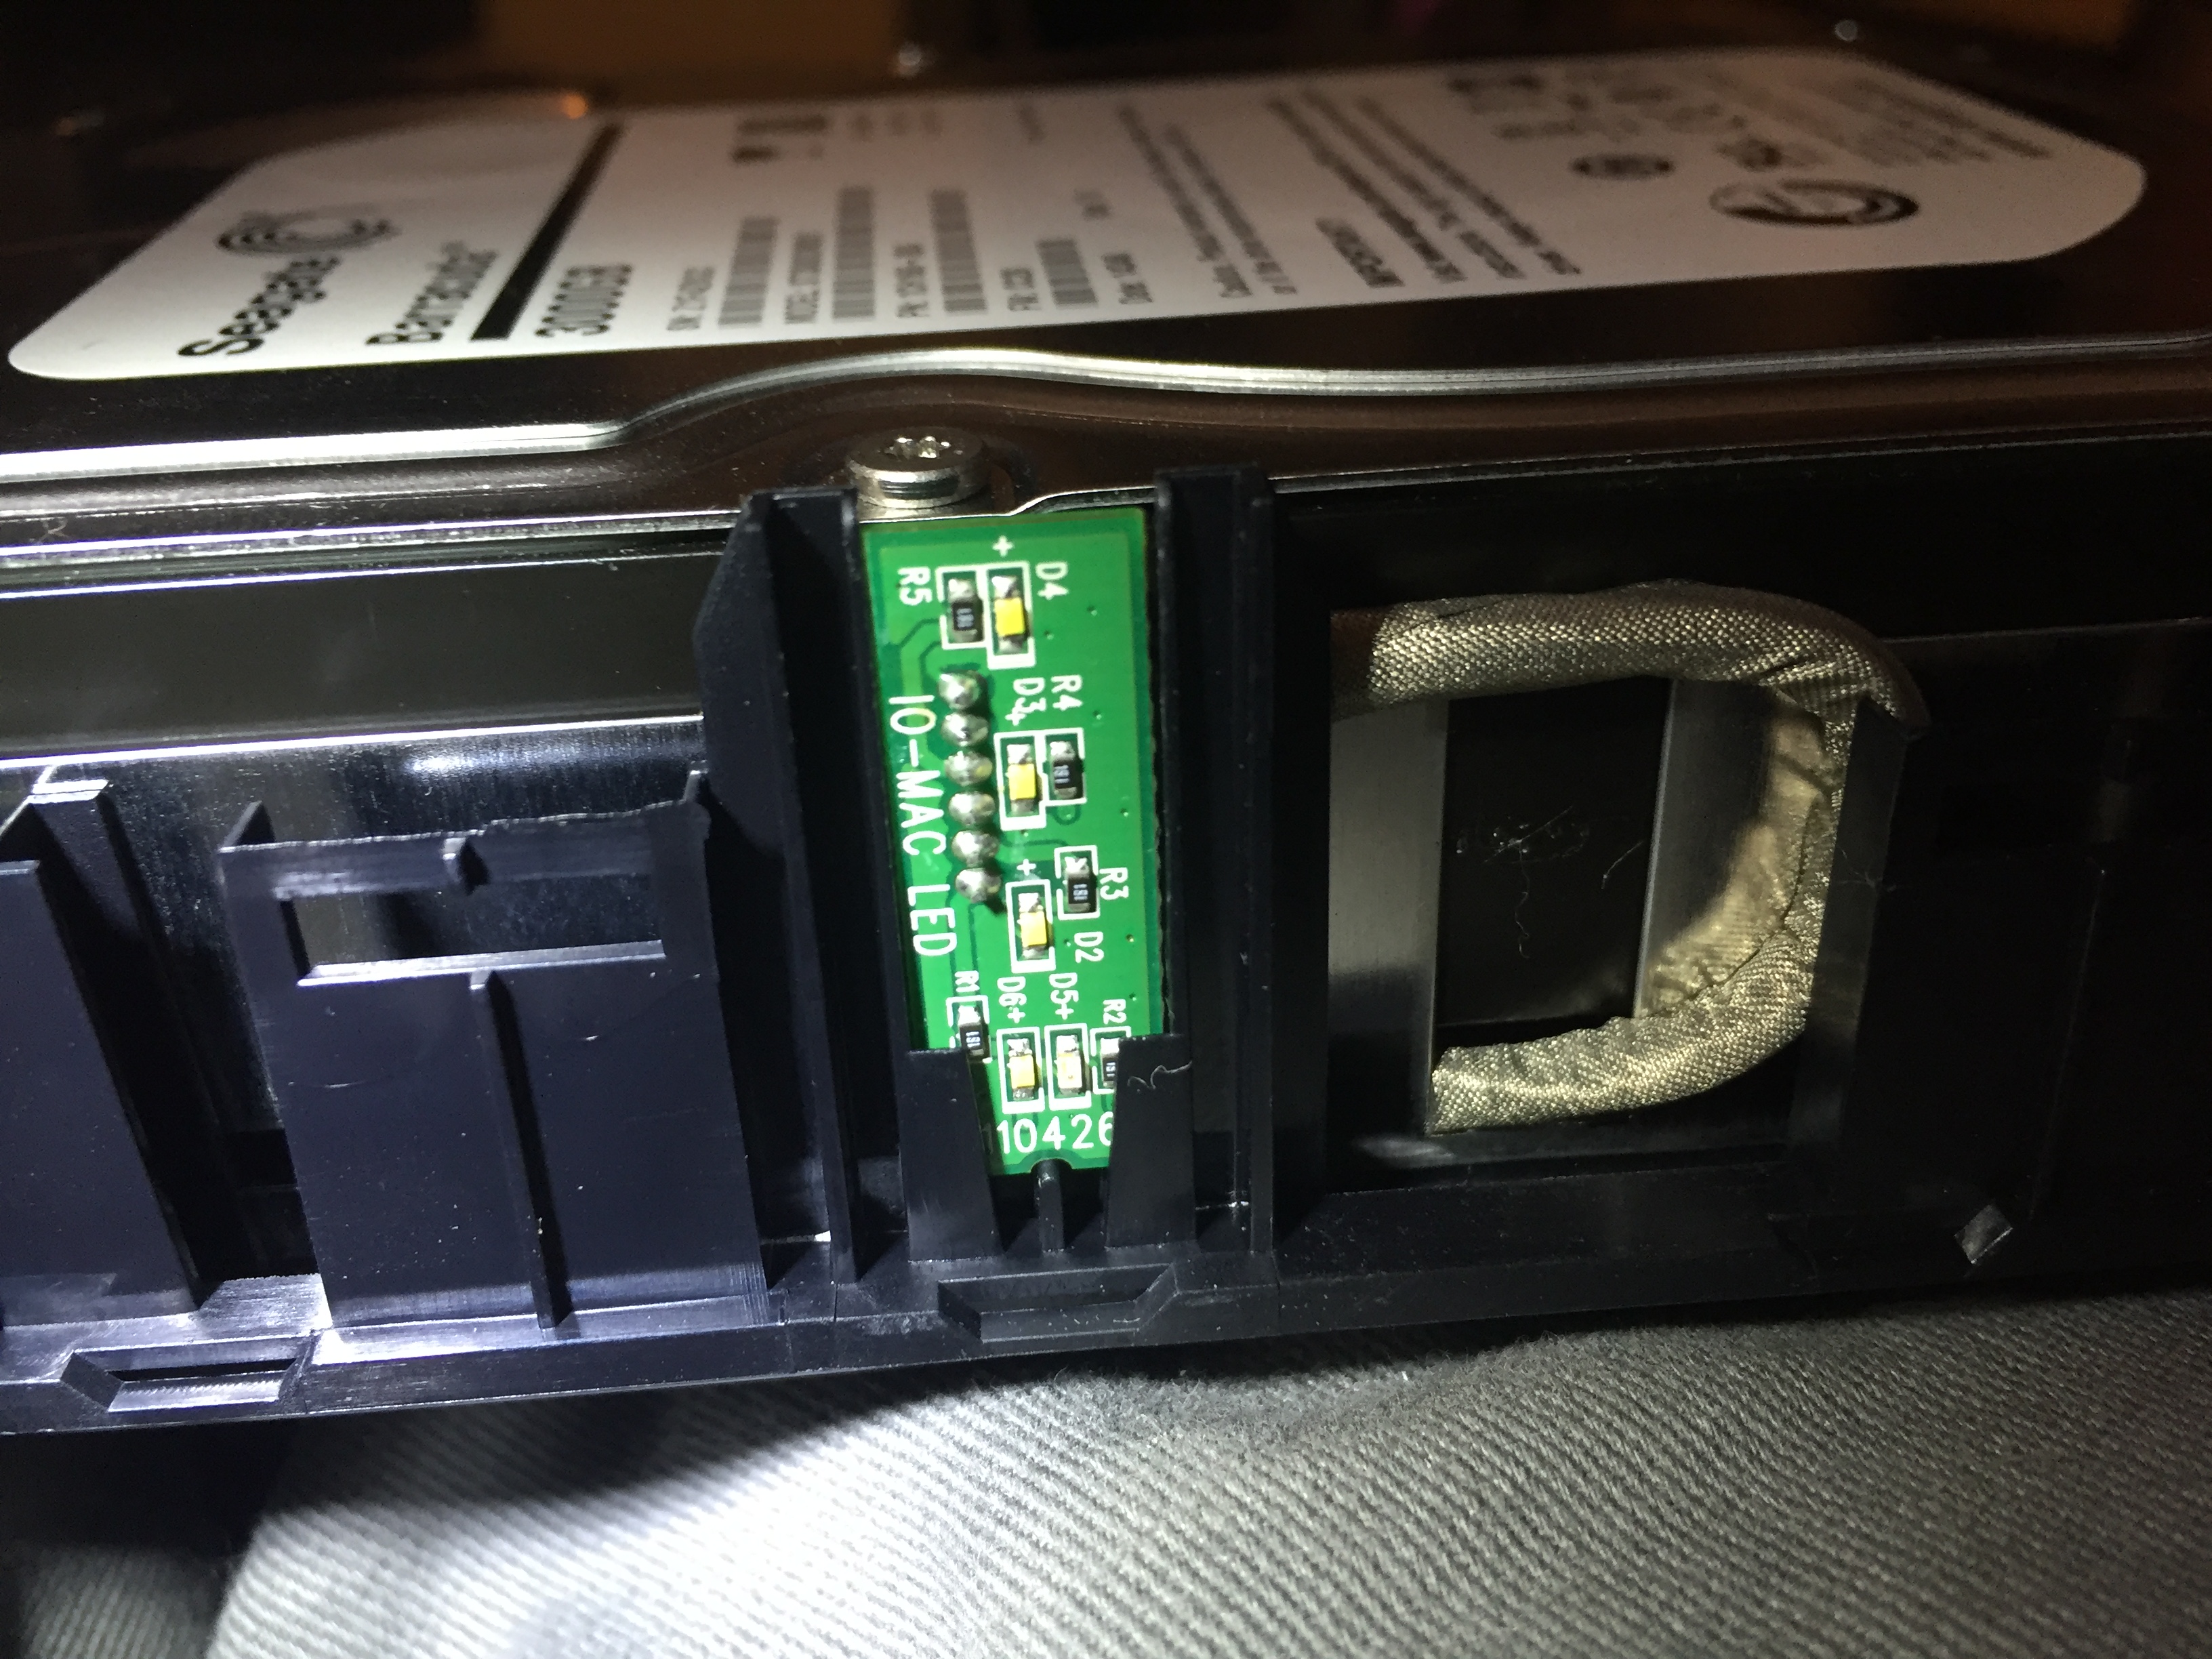
Step 6: The circuit board on the end of that pigtail cable hanging out the side actually has four LED’s on it. The tiny circuit board fits into a slot in the plastic base. Note that there is a wee indentation in the board at one end; that part goes DOWN, where it seats neatly on a plastic fin:
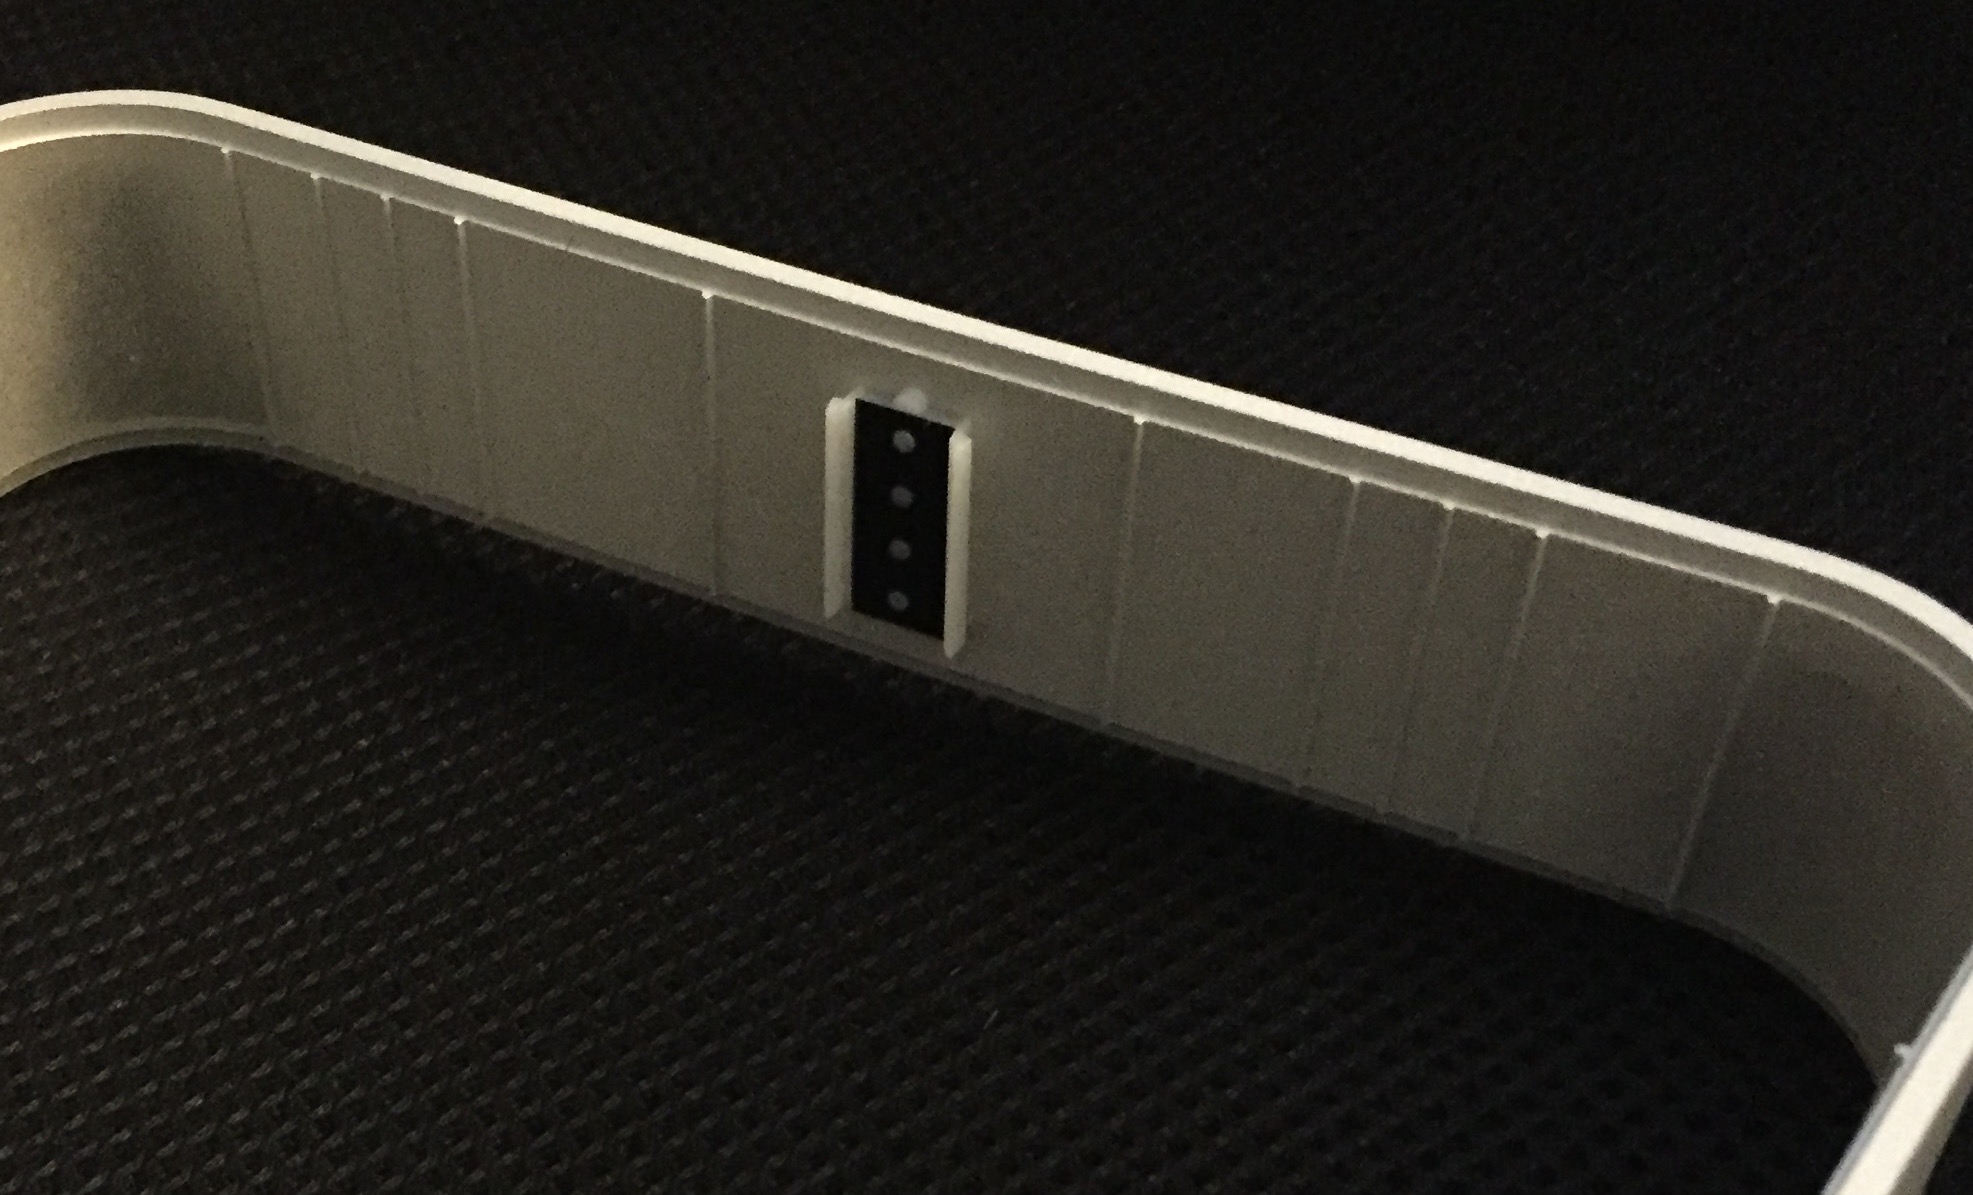
Step 7: Now it’s time to put the outer metal housing on. There’s an odd plastic bit you set aside earlier with four little shafts sticking out. Those go into the holes in the front of the housing, and as you put the housing down over the plastic base the odd plastic bit will slide into the holder directly in front of the circuit board from step 6.
Step 8: At this point, everything is connected and should be functional. Before passing the following Point of Maybe-No Return, I plugged in each unit and made sure it spun up happily.
Step 9: Snap on the lid. You’re finished! Woo!
I have no idea how to remove the lid again; and hopefully I’ll never have to learn. Now I have a lot of room for data. Setting up my poor-man’s RAID will likely have to wait until next weekend, and hopefully will be simple enough that I don’t need to write a how-to. In the meantime, I hope this is helpful to those who find themselves with a question mark hovering over their heads as they stare at the parts they have just received.

Let me take this moment to thank you for backing my stuff up for years. Quietly, unassumingly protecting my bits and bytes from the apocalypse. Cheers, mate.
Pardon me for sounding like a commie, or even a socialist, but looking out for your pals is not a burden.
Ditto on the thanks. Should I abandon CrashPlan? Connection’s been offline for 1.5 mos.
It looks like yours started to fail (stopped succeeding?) then one other, then one other. Let’s see if moving the backup to the new server makes things happy.
Mac Mini started grabbing data, then stopped. Just passing on data points, not whinging. I’m getting every penny’s worth from your server.
Hi I got one of these essentially for a Dock I would buy another but the shipping is $29 did you make the RAID?
I used mine as a firewire dock I snipped the triangular bits off the cover so its easy to get a drive in or out.
Now i have run into a bit of a problem drives formatted in this enclosure are not recognised when put in other docks and the other way round i think it is something to do with bit shift and lba addressing would you know anything about that?
Yes, the RAID is set up and silently backing up my data. SoftRaid does a very good job.
Clever idea using one of these for a doc. All those powered ports are pretty sweet.
Unfortunately I have no idea how to help you on the drive-formatting issue. It seems odd, but that’s an area of techno-geekery I have managed to avoid learning.
Hi Jerry,
I found a seller on eBay selling this thing new for only $9.59, and I plan to either use this enclosure as a time machine or as a bootable backup, and plan on using the firewire connection in order to take advantage of its higher speed.
I read an amazon review that you can only boot from this enclosure via the usb, not the firewire. That review also mentioned that you can’t use this enclosure with Carbon Copy Cloner over firewire. Did you find those 2 things to be true?
Sorry for the slow response. I have not tried to use my drives for anything like that; I’m using SoftRaid and CrashPlan to use them as a single backup volume with fault tolerance.
But ten bucks is a really good price for these guys.
I have a 6TB drive I’d like to put into a firewire equipped enclosure and I saw this posted on eBay. The posting states that it is limited to 2TB. Is that because the indicator lights were designed for the original drives Iomega included in the unit? Or is it because the bios or firmware can’t handle anything beyond 2TB? If the answer is the lights will no longer be accurate, I don’t care as the unit will not be seen but if it just can’t handle anything beyond 2TB, I’m oou of luck.
I look forward to your answer. Thanks for the instruction guide.
I’m afraid I don’t know enough about where the restriction comes from to comment, except to say I have 3TB drives in mine and they work just fine.
I just swapped a Seagate 4TB IronWolf for the existing 500GB “Mediamax” drive I’d originally installed. Plugging it in with the FireWire 800, Disk Utility sees the entire 4TB.
Clearly there’s no logic in the enclosure that limits the SATA addressing here.
As for opening one of these, I used an angle-tipped spudger. Insert the tip into the vent slot on top a bit to one side and lift. It’ll start to pop loose (like a laptop bottom when the screws are out), lift until you can get the tip under the outer lip, then start going around the perimeter, popping loose the clips holding it in place. Once you get started, it’s easy enough.
Pingback:
Would you please provide me with the procedure for wiping the data from a Mac Companion 3TB, if the procedure is possible in the first place. I use a Mac Pro (Mid 2012); run Mac OS X El Capitán. If you can’t help me, please direct to someone who can.
The procedure is pretty much the same no matter what the drive is; run Disk Utility, select the drive, and if it’s not your boot drive you will have an Erase option in the toolbar.
Thanks for the info, I followed your steps and successfully assembled mine.
For those wondering if this enclosure will work with drives larger than 2 or 3TB I just got one and successfully installed a 4TB Seagate drive. I also filed some slots on the top cover above each clip so I can use a screwdriver to release the clips if I need to reopen this enclosure in the future because otherwise it looks like once it snaps closed there is no good way to reopen it.
Good call on the slots. I will one day wish I had done that.
The one day has arrived. 35,000 hours on the HDDs is apparently pushing it.
As a coda to this episode, and an endorsement of the configuration in general, I recently discovered that one of the three drives in my SoftRaid volume had failed. Yet my data was still intact, and our backups were still happening. That is what going to this sort of trouble is all about.
To be clear: this is our highly available backup – should something go terribly wrong and we lose a working computer, we can restore in fairly short order from this RAID volume. We also have the highly secure backup, which lives in encrypted form in some place called Wasabi and will survive any disaster that we of mortal flesh do. The downside is that recovering from that backup would take days or even weeks, which could be mitigated somewhat with the rigorous application of cash. A great plan B, not so much a plan A.
If your data is not in three places, it doesn’t exist.