I’ve had a beard almost continuously for the last couple of decades. Not because I think I look particularly good with a beard, but because shaving is a pain in the butt. I just let the damn thing grow, occasionally cleaning up my neck while I’m in the shower, and every now and then pulling out the heavy-duty hair clippers (those little groomer things are helpless against my facial hair) slapping on the #2 guide, and hacking the thing back.
A couple of times recently I’ve been even more slovenly than usual and allowed my beard to get quite bushy. This time around, I decided to have a little fun with it. I shaved off most of it, but kept the goatee. Since then it has gotten even longer, and I’ve been shaving the rest of my face.
Yep, I’ve been doing almost as much work as going completely clean shaven. You see, I like the way the thing looks. Vanity has stepped up and bumped Sloth to the curb, at least for a while.
“How long are you going to let it get?” the official sweetie of Muddled Ramblings asked me a few days ago. I didn’t really have an answer for her. Later I came to another realization: I don’t even know how to trim the dang thing. So for now at least, it’s still getting longer.
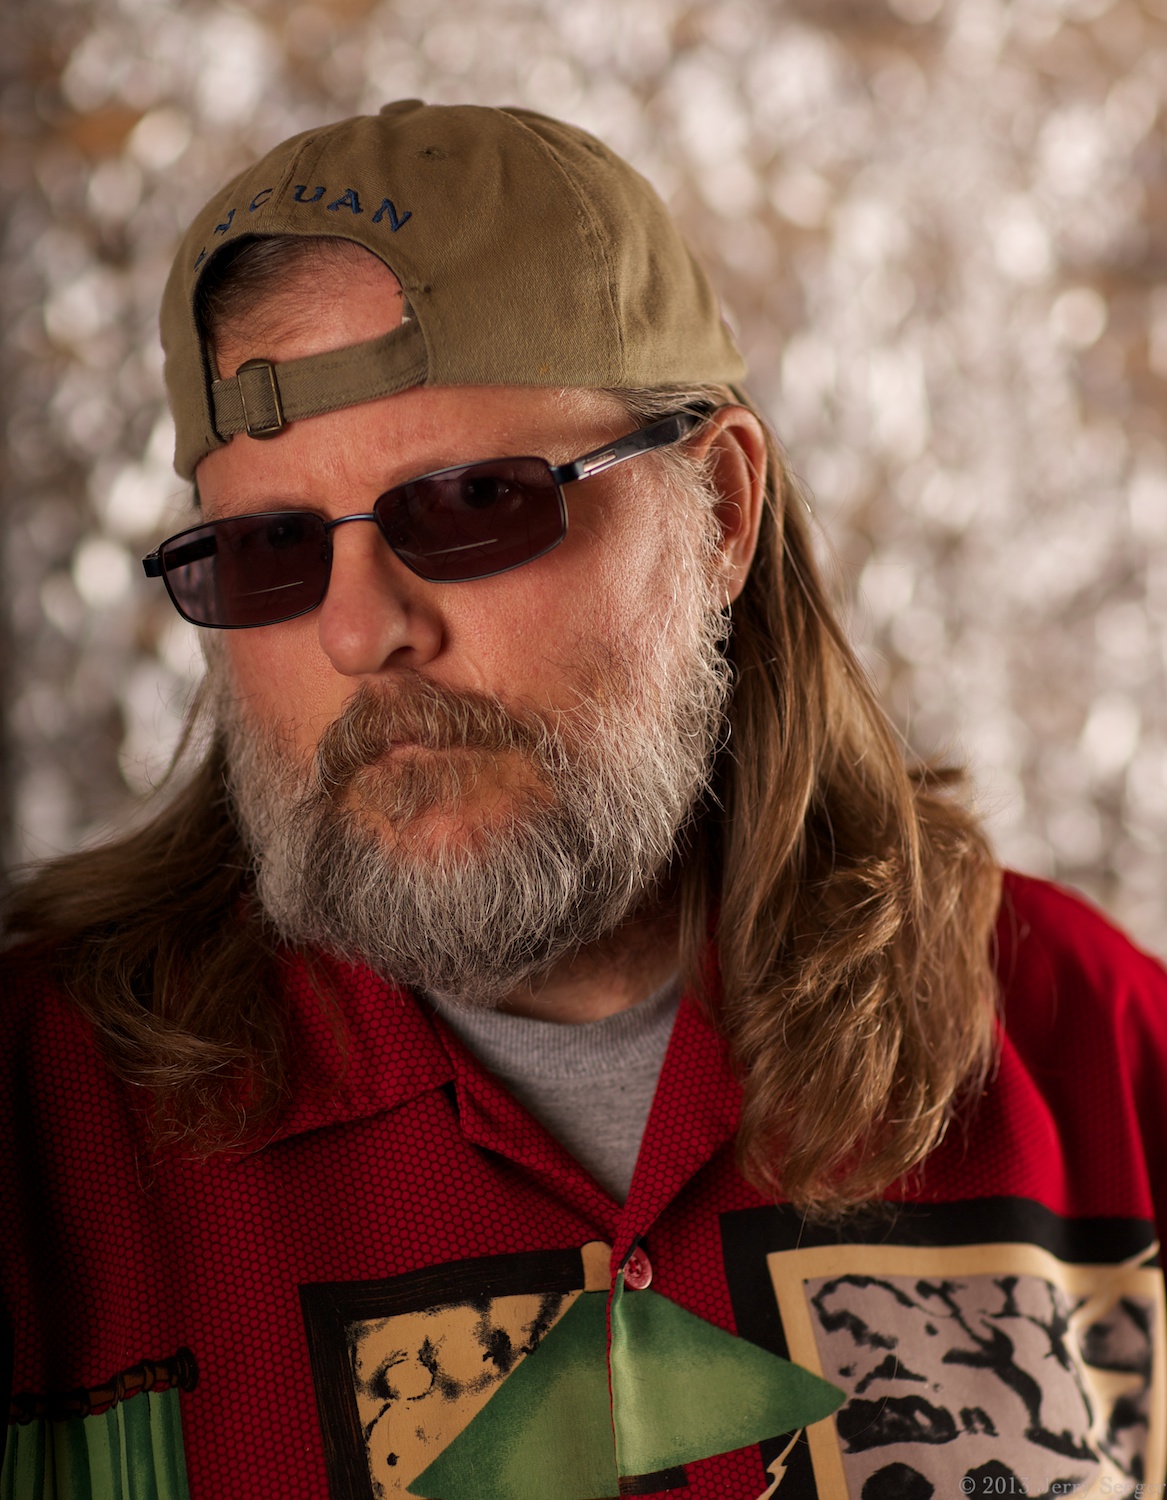
This weekend I decided to take a few self-portraits to memorialize Vanity’s time in the spotlight. I have an old Russian Industar 50 lens (no need to add vignettes in post!) that I ended up getting for almost free, that I had yet to really play with. It came with a yellow filter, which is useful for Black and White (mostly outdoors, but hey). Black and white shots of my salt-and-pepper beard (more salt these days) seemed like a swell idea, so that’s what I did.
One thing about a manual-focus lens, self-portraits are a little trickier. Happily my eyefi mobi lets me see the pictures on my iPad without me having to move from my spot. Even with that, I ended up throwing away a lot of shots that weren’t in focus. Once the shots were loaded onto my computer, I converted the RAW files to black and white. The hard part there: which black and white? I spent quite a while fiddling with settings, and I could have spent even longer, but good ol’ Sloth intervened.
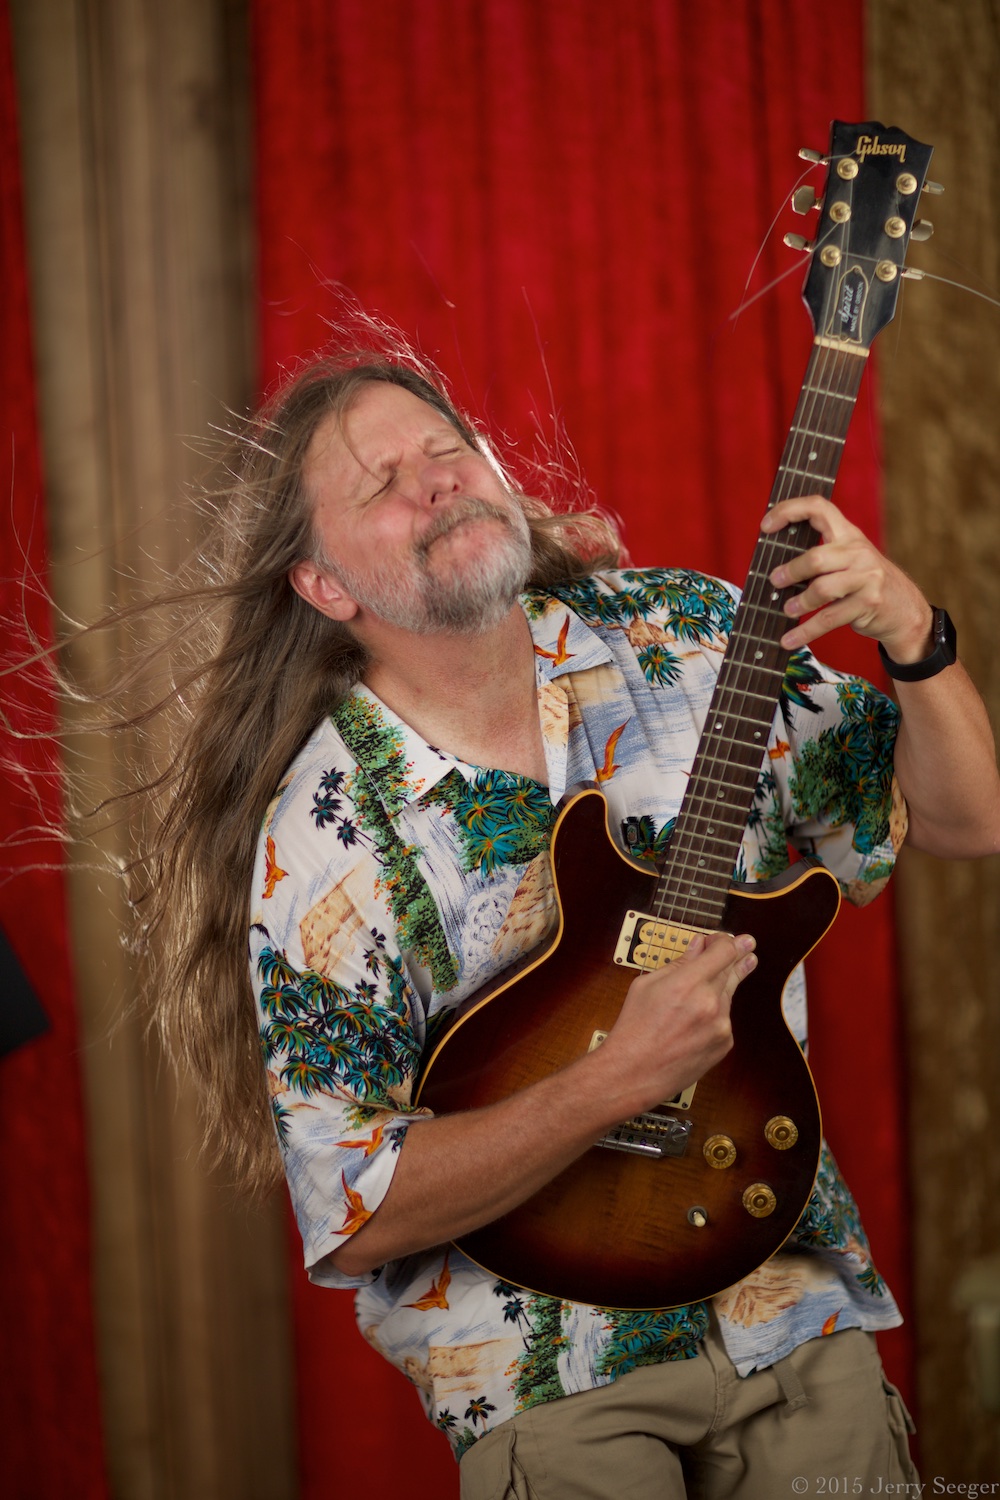
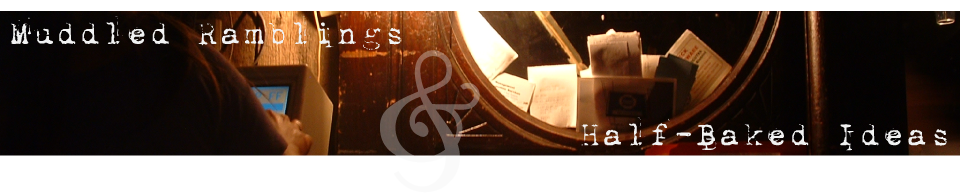
I was taking a beard-stroking picture, but I fumbled with the camera controller. Came out all right, though.
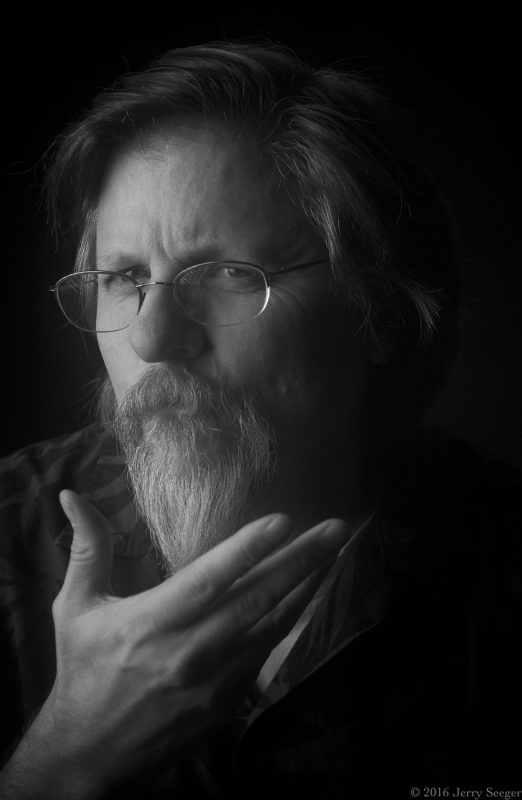
One thing about this facial hair setup, my cheekbones are visible. I should smile more.
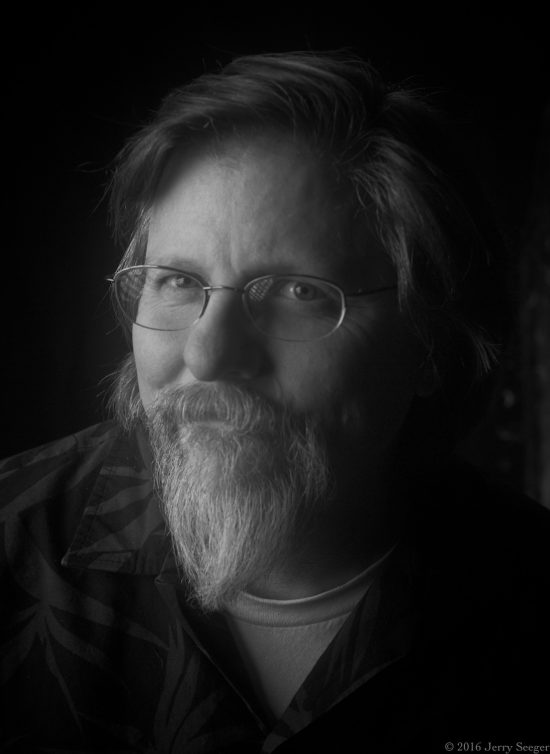
The first time I’ve seen what it looks like from the side.

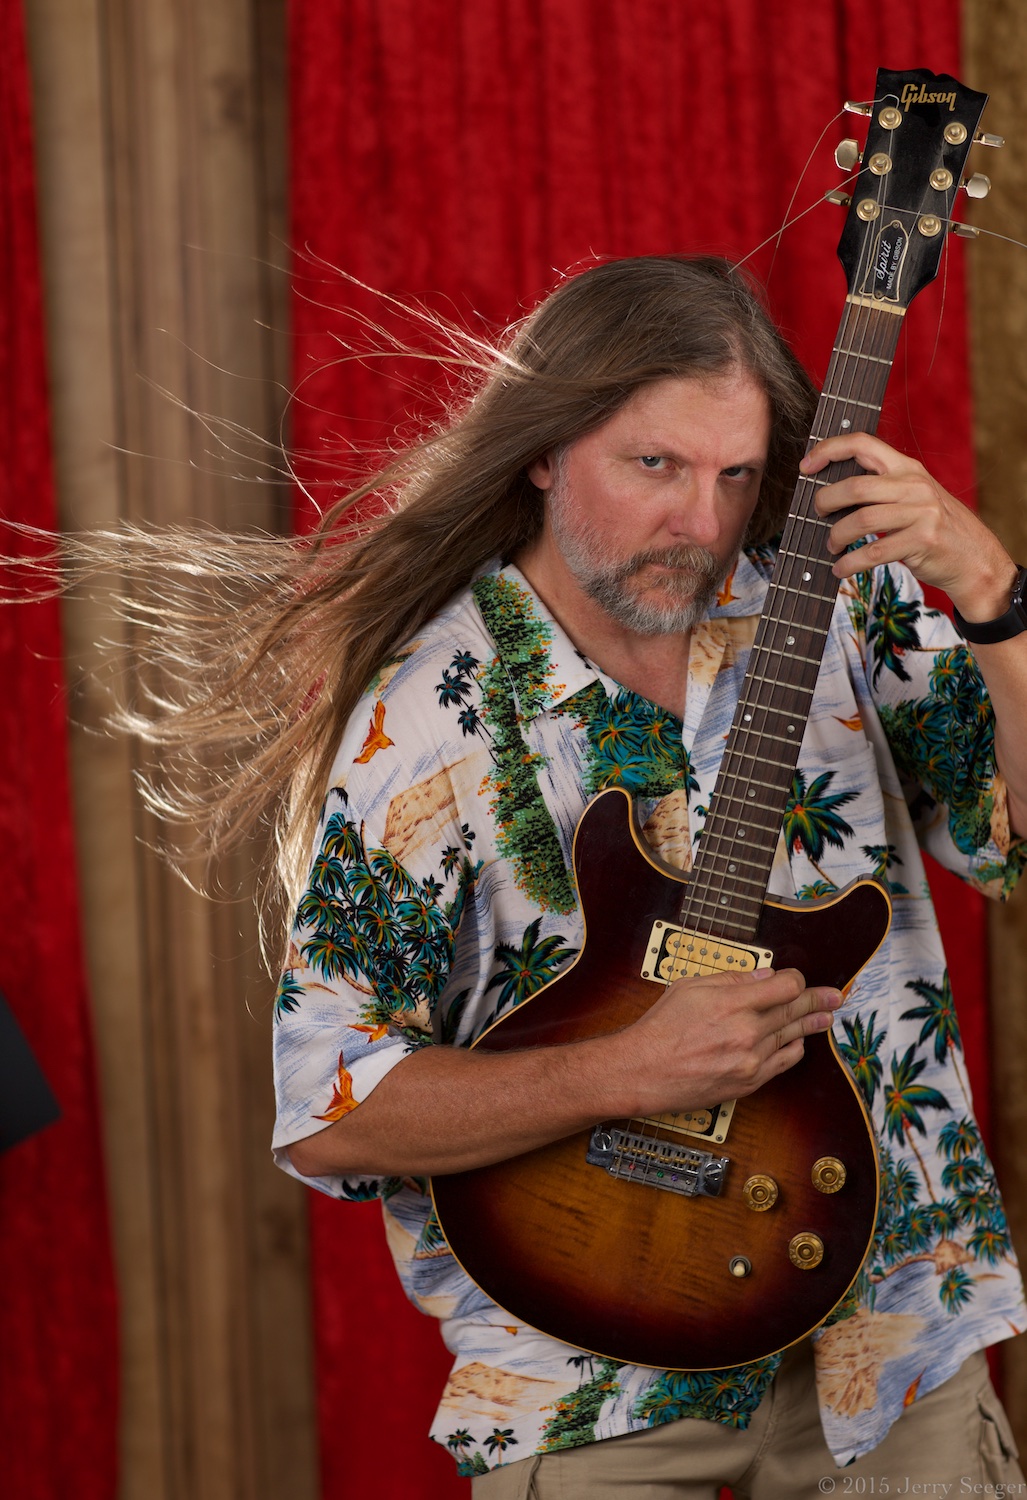
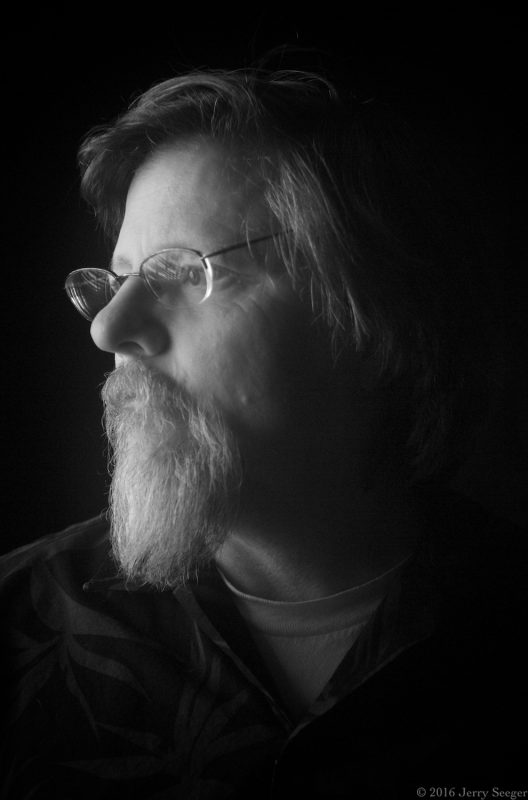
A more dramatic pose.
Technical notes:
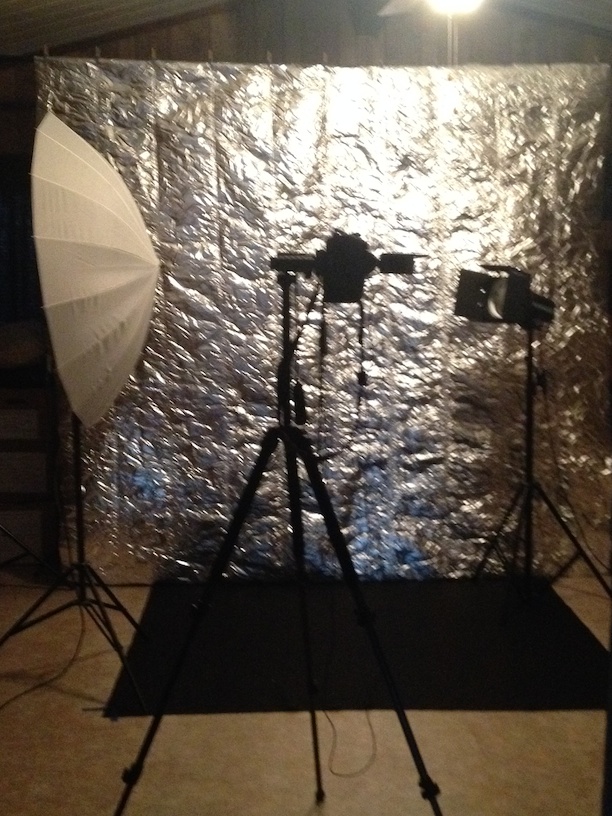
These were all shot with a Canon 5D Mk III, ISO 100 at 1/125 s. I started with the lens at f/3.5, but lost too many shots to focus and stopped it down to f/5.6-ish. (The aperture on the Industar is continuous, not “clicky” like on most lenses with manual aperture controls.) Light came from one strobe to my right (and reflected in my glasses), and another at very low power above and behind my head.